nibnob21
Premium Member
 Registered: 16th May 10
Location: South Derbyshire
User status: Offline
|
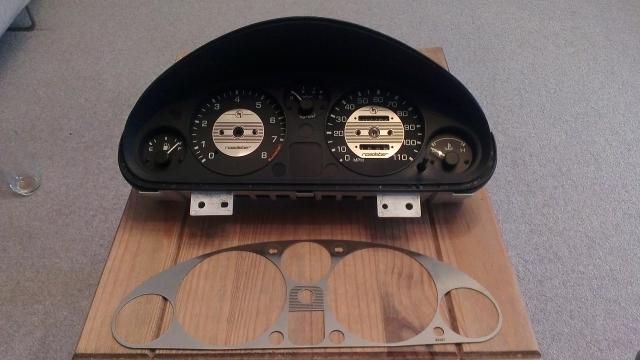
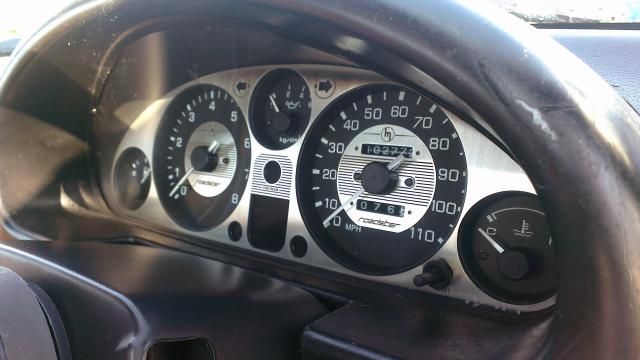
Got the correct dial surrounds sent to me so back out came the cluster:
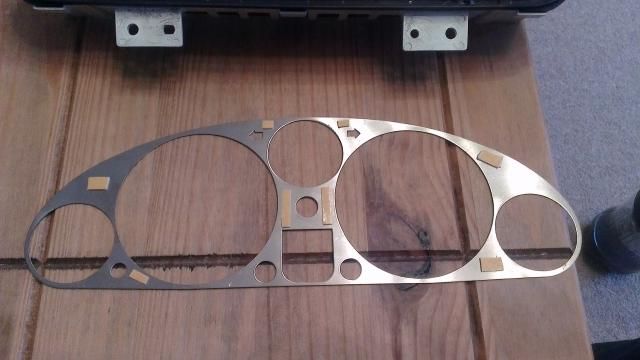
Small bits of number plate sticky pads used to stick the surround to the cluster:
And back in the car:
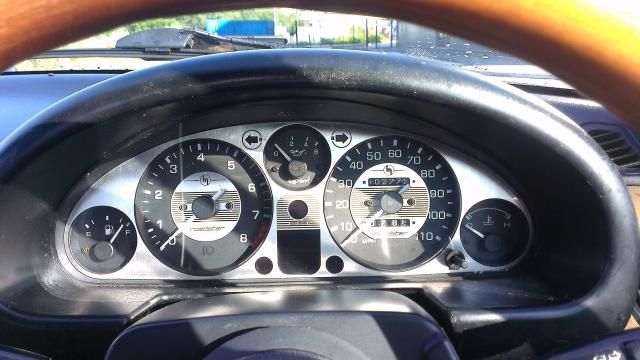
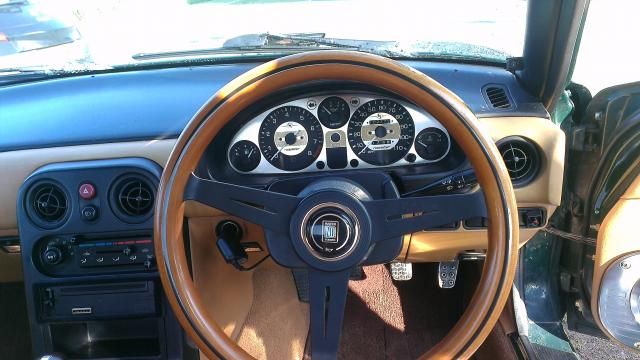
MX5 Project Thread
|
spencer88
Member
Registered: 6th Oct 08
Location: cornwall
User status: Offline
|
You after any bits? I am taking loads off mine whilst it is off the road.
|
willay
Moderator
Organiser: South East, National Events
Premium Member
 Registered: 10th Nov 02
Location: Roydon, Essex
User status: Offline
|
8/10 would bang
[Edited on 14-07-2014 by willay]
|
nibnob21
Premium Member
 Registered: 16th May 10
Location: South Derbyshire
User status: Offline
|
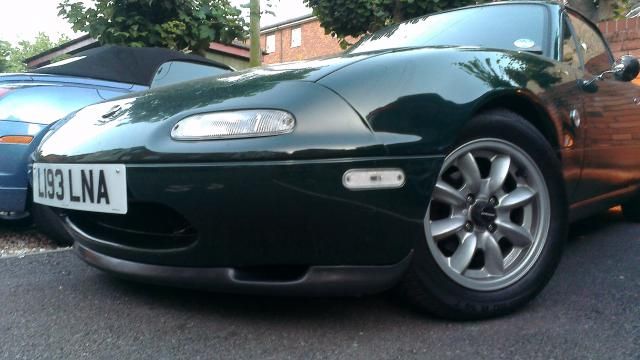
Picked this up in a group buy. Still expensive for what it is, I paid £75 instead of £95 (usually around £80 second hand!).
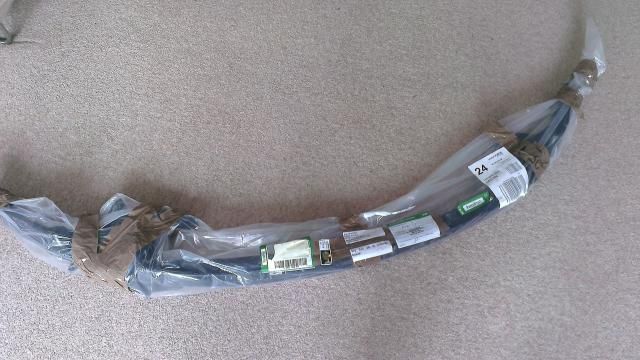
Very happy with the look of it though 

MX5 Project Thread
|
djgritt
Premium Member
 Registered: 1st Nov 07
Location: Dorset Drives: Focus ST / Hyundai i20N
User status: Offline
|
Nice addition. 
|
nibnob21
Premium Member
 Registered: 16th May 10
Location: South Derbyshire
User status: Offline
|
Cheers Dave.
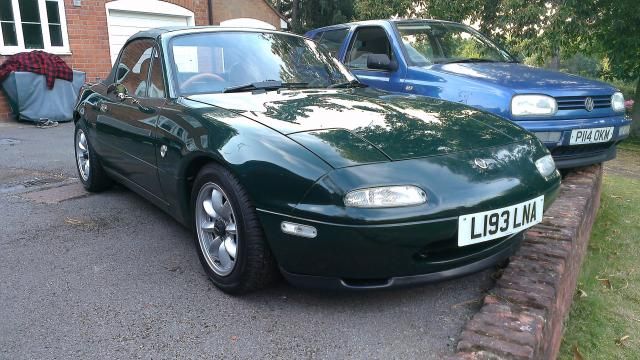
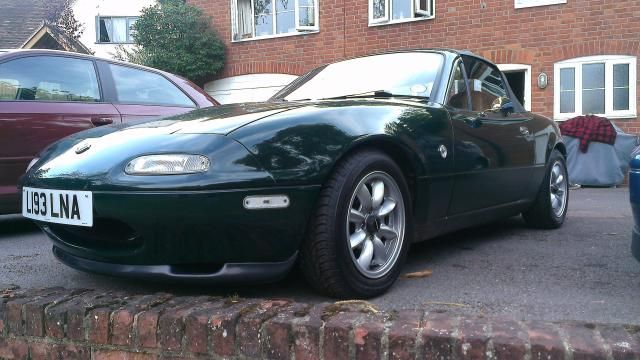
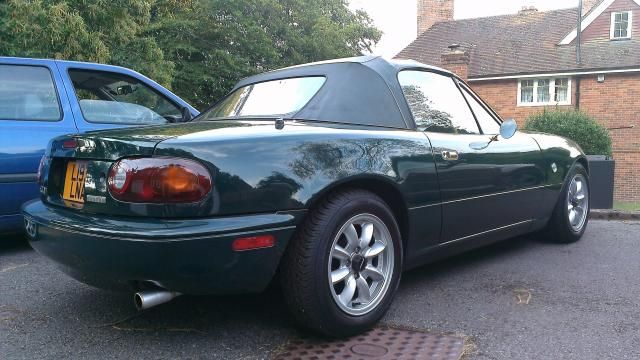
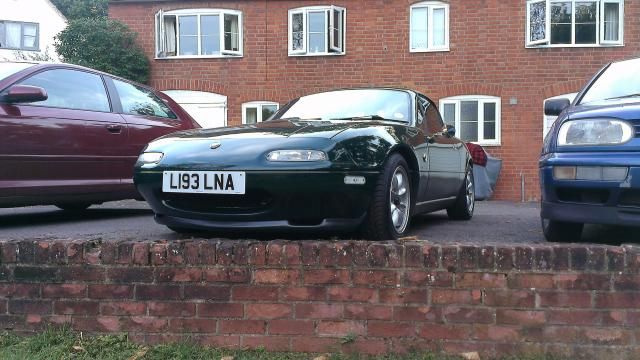
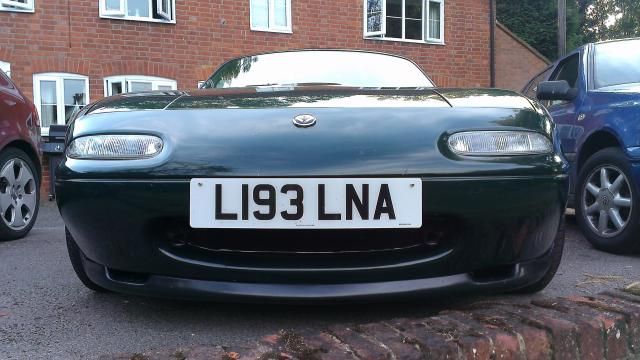
Few more pics for the sake of it:
MX5 Project Thread
|
boylers11
Member
Registered: 27th Jul 06
Location: Shropshire
User status: Offline
|
Looks really smart, nice and clean. Weird question, but what's the yellow lighting behind the car on the wall in the 3rd pic of the splitter?
|
Haimsey
Premium Member
 Registered: 8th May 05
Location: Nottingham Drives: Corsa B
User status: Offline
|
Looks good.
The yellow i assume is a light post which you can see here
http://i57.photobucket.com/albums/g230/nibnob21/Eunos%20Roadster/0282.jpg
Marcy Marc 
White Sport Progress Thread
|
nibnob21
Premium Member
 Registered: 16th May 10
Location: South Derbyshire
User status: Offline
|
Cheers gents. And yes, it's just a light post.
MX5 Project Thread
|
nibnob21
Premium Member
 Registered: 16th May 10
Location: South Derbyshire
User status: Offline
|
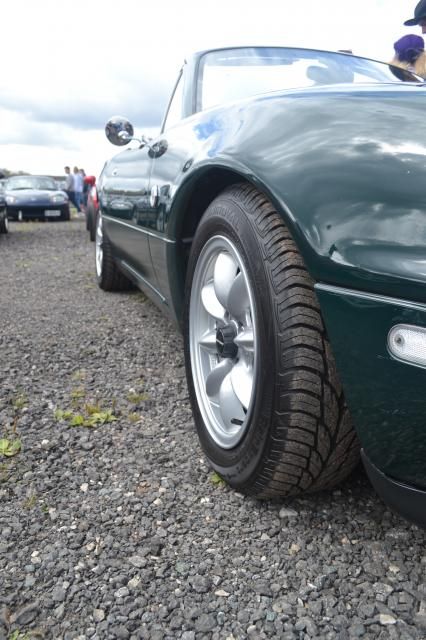
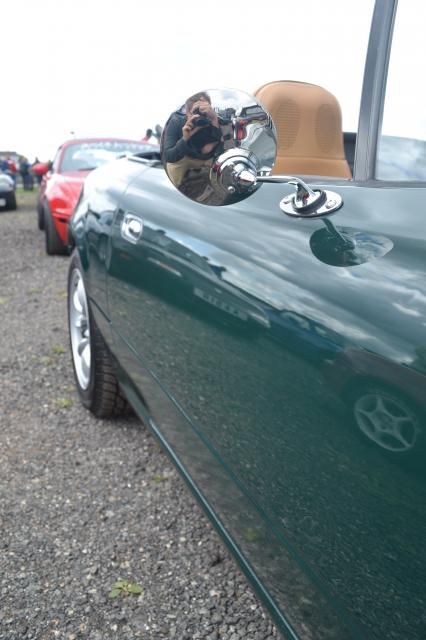
Went to Japfest2 at Donington park today.
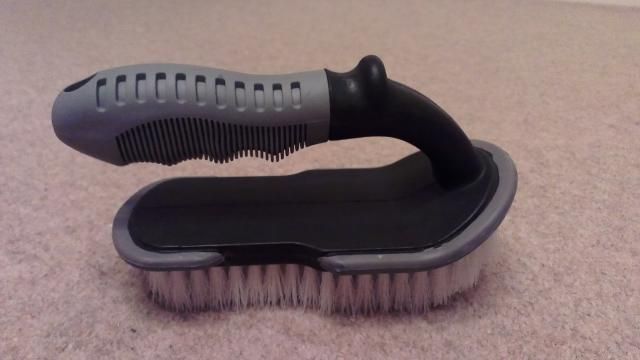
Didn't do anything major in preparation. Bought a good brush so I can properly clean the roof:
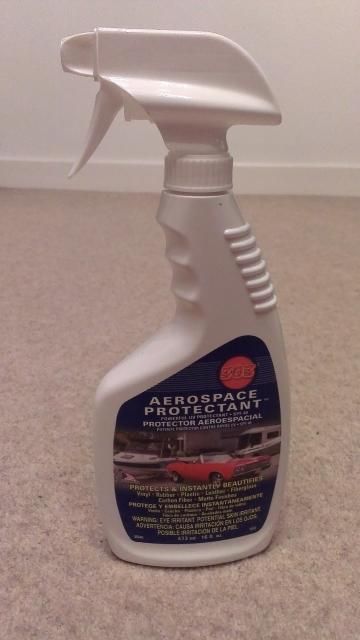
Then bought this brilliant stuff for reviving and protecting the roof:
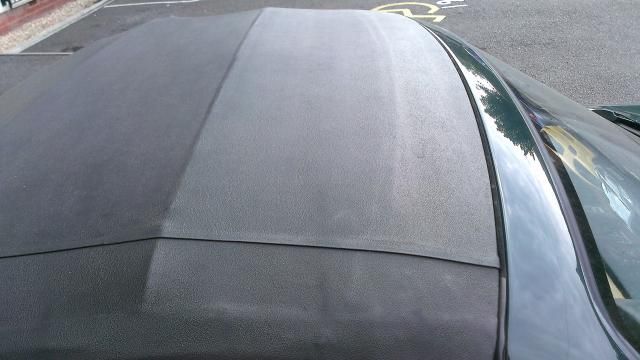
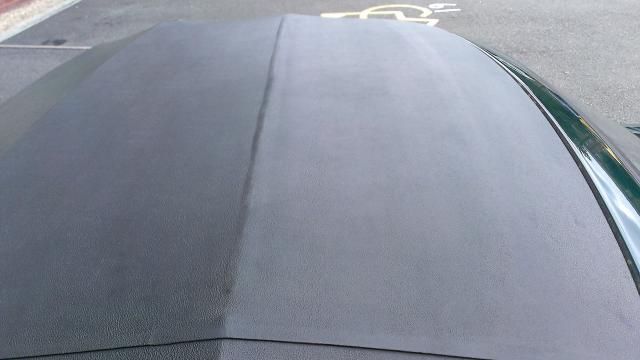
Couple of before and afters, very hard to capture how much cleaner and blacker it is now:


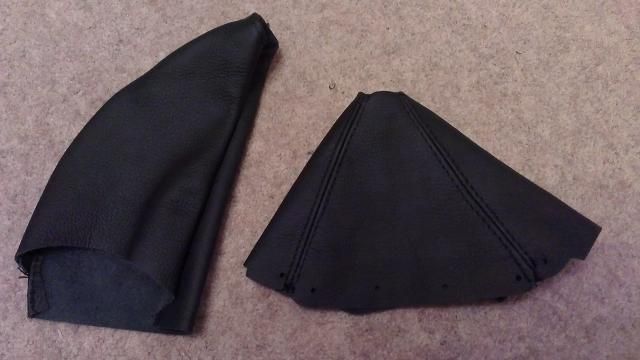
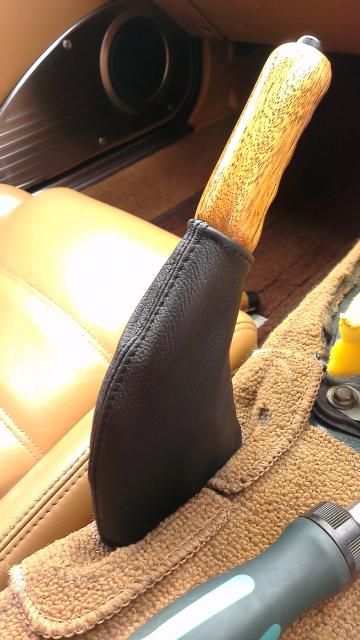
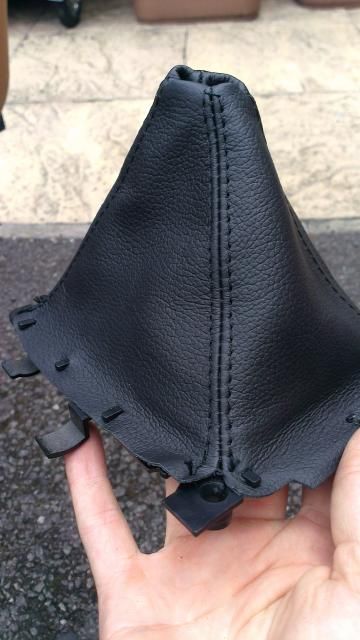
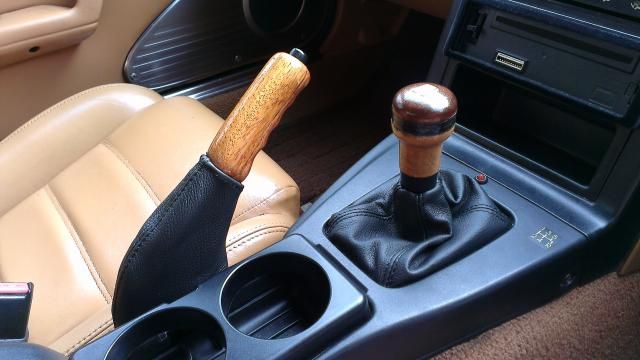
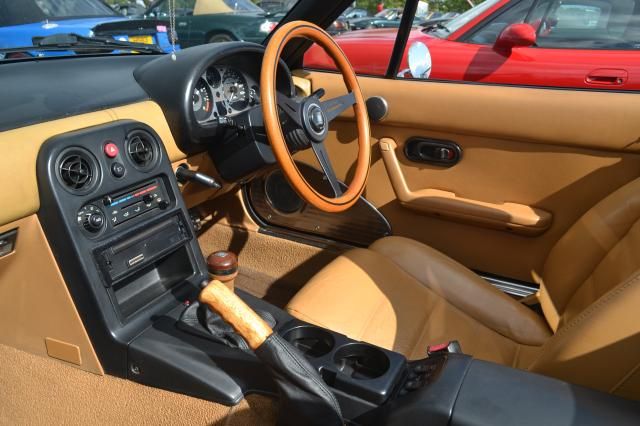
Also bought a new leather gear gaiter, and a leather handbrake gaiter to slide over the tatty plastic cover:
Handbrake gaiter fitted:
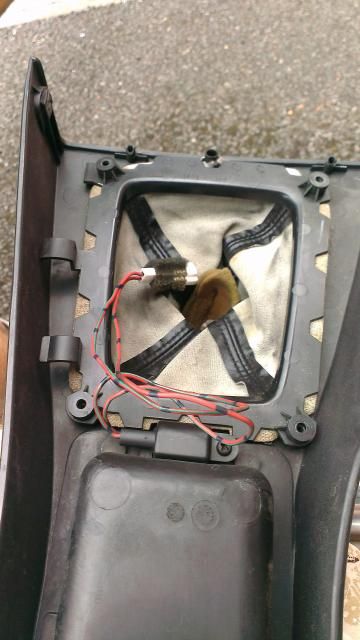
Centre console removed:
Old gaiter:
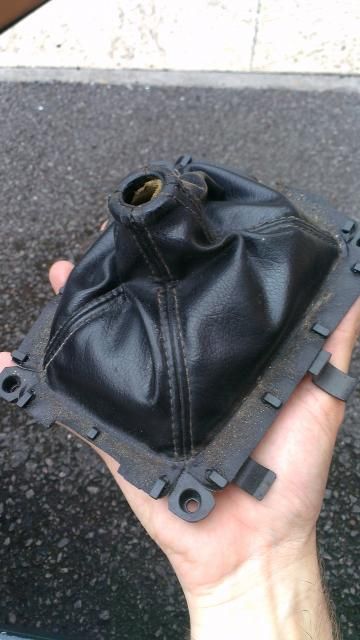
New one fitted to plastic surround:
All back together:
Gave it a wash and good to go:
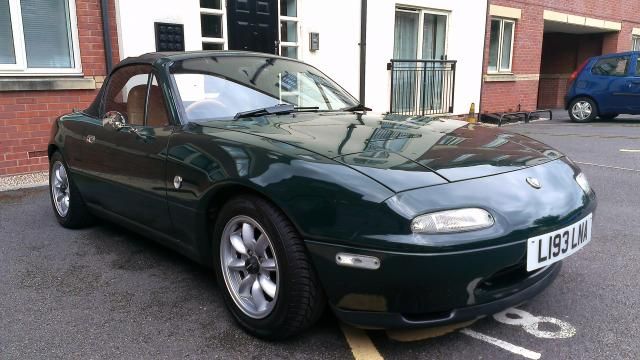
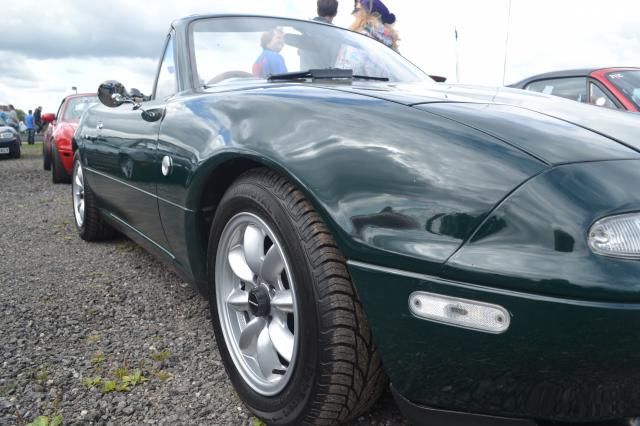
And a few pics from today:




MX5 Project Thread
|
ArdenblueDan
Member
Registered: 23rd Aug 12
Location: Basildon
User status: Offline
|
Looks really good mate love how the new splitter makes the car look lower even though it's not if you catch my drift
|
Kyle T
Premium Member
 Registered: 11th Sep 04
Location: Selby, North Yorkshire
User status: Offline
|
Smart!
Lotus Elise 111R
Impreza WRX STi
|
nibnob21
Premium Member
 Registered: 16th May 10
Location: South Derbyshire
User status: Offline
|
quote:
Originally posted by ArdenblueDan
Looks really good mate love how the new splitter makes the car look lower even though it's not if you catch my drift
Yeah I know what you mean. I like how it gives that look from the front.
quote:
Originally posted by Kyle T
Smart!
Cheers 
MX5 Project Thread
|
nibnob21
Premium Member
 Registered: 16th May 10
Location: South Derbyshire
User status: Offline
|
Got around to doing the timing mod today 
Popped round to the guy that I bought the car off in Ashby as he has a timing gun.
There's a small dial by the bottom pulley that tells you the timing with reference to degrees before Top Dead Centre. We made the marks more visible with a white paint pen. The far right (T) is TDC then every marked notch to the left is 2 degrees advanced timing. The normal setting for the car is 10 deg. Due to the better fuel quality in the UK (95 RON as standard as opposed to 87 RON in the US) the engine can cope with advancing the timing further without the risk of knocking.
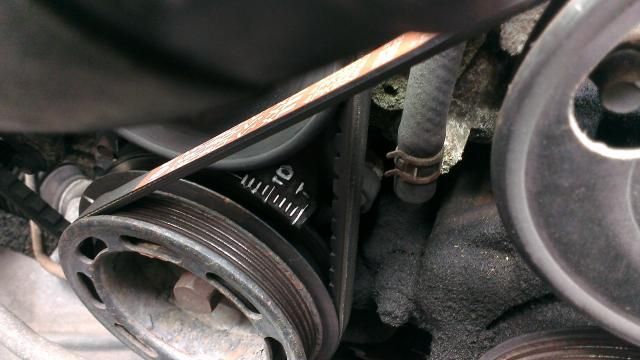
First job was to check the current timing. There's a small notch in the bottom pulley that we marked up with the paint pen to make it easy to see with the timing gun (you can see this on the left of the pulley in the pic above). So by hand we turned the pulley until the notch lined up with the T on the dial. We removed plug 1 and put a long screw driver in the hole so it rested on top of the piston. Then by turning the pulley each way we determined the piston was at the top position (screw driver bobs up and down). All was good with everything lining up as it should.
With the spark plug put back in and the engine running we shone the timing gun on the bottom pulley and we could see the marked notch on the pulley was flashing up against the 10 deg mark, as we expected it to be.
So now we slackened off the cam angle sensor and adjusted it until the notch then flashed up against the 14 deg mark. We tightened up the cam angle sensor bolt and that's basically job done.
Only thing left to do is to adjust the idle control screw to ensure that the natural idle matches the ecu setting. You should just about be able to see the screw in the pic below, you just turn it clockwise or anticlockwise to adjust the idle revs. By bridging a connection on the diagnostics port it's possible to turn the ecu off, allowing you to adjust the idle control screw until the engine sounds the same whether the ecu connection is bridged or not.
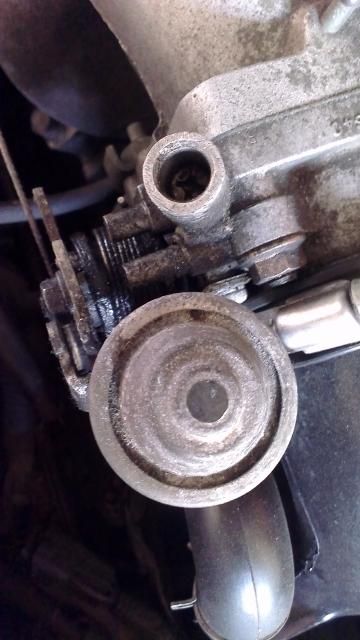
The overall result? The car is more responsive and has a bit more low down torque. It definitely feels 'perkier' and it doesn't feel as strained when going up hills. Very happy considering it's so simple and free to do 
MX5 Project Thread
|
djgritt
Premium Member
 Registered: 1st Nov 07
Location: Dorset Drives: Focus ST / Hyundai i20N
User status: Offline
|
Interesting mod there. 
|
nibnob21
Premium Member
 Registered: 16th May 10
Location: South Derbyshire
User status: Offline
|
quote:
Originally posted by djgritt
Interesting mod there. 
Yeah it's a good little free thing to do  The change is nothing dramatic, but as said it does feel more responsive. The change is nothing dramatic, but as said it does feel more responsive.
There have been several dyno tests on the results of advancing the timing on the 1.6 and generally speaking, each degree the timing is advanced brings the torque curve forward by about 100 rpm. So changing it from 10 deg to 14 deg means the torque that was delivered at 2400 rpm for instance, is now delivered at 2000 rpm. Obviously this effects the top end, but I don't live on the red line so I'm happier having the power lower down.
MX5 Project Thread
|
Darryl H
Organiser: South Central
Premium Member
 Registered: 19th Nov 09
Location: Camberley Drives: Porsche 944
User status: Offline
|
Good work! Quite cool being able to advance the timing like that and it being ok.
|My Corsa|SC|My Instagram|
|
nibnob21
Premium Member
 Registered: 16th May 10
Location: South Derbyshire
User status: Offline
|
All down to our superior fuel quality 
You can't really take it much further without the risk of pinging, but at 14 degrees with 95 RON it's perfectly fine.
MX5 Project Thread
|
nibnob21
Premium Member
 Registered: 16th May 10
Location: South Derbyshire
User status: Offline
|
I have an annoying rattle that I can't track down. It becomes apparent normally on the overrun roughly around 2500 - 3500 rpm.
First I thought it was the baffles in the back box, but after further investigation the sound seemed to be coming more from the middle/front end of the car.
So I thought I'd investigate further at the weekend as I've read the heat shield rattling around the CAT is a common issue...well it turns out the heat shield has already been removed:
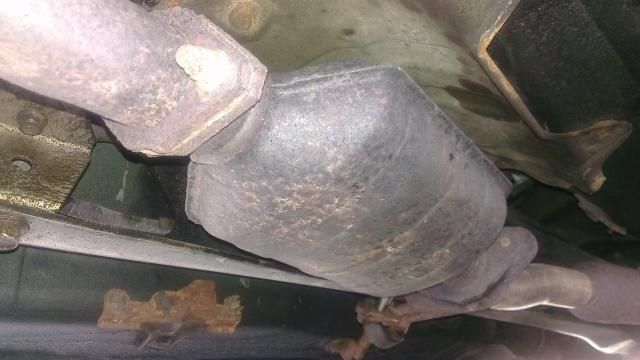
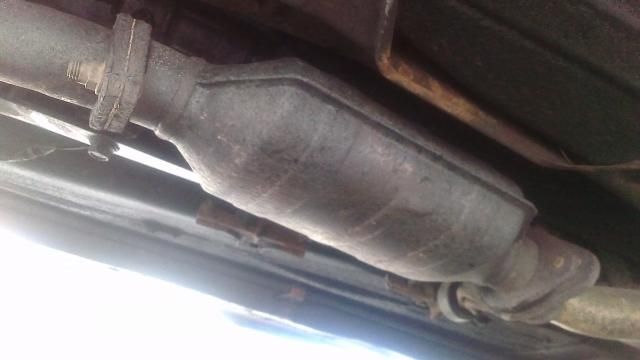
The CAT itself seemed nice and solid and didn't seem an obvious source of a rattle, but it could perhaps have loose internals; hard to tell. The whole system is mounted very rigidly so I don't think it's fouling the frame around it.
The other small heat shield at the bottom of the manifold seems solid enough. Some bits poking out the other side of the clamp may be causing a small rattle but they seemed pretty harmless. I did try bending them out of the way as shown below. It is a very tight space though so removing them wasn't really possible.
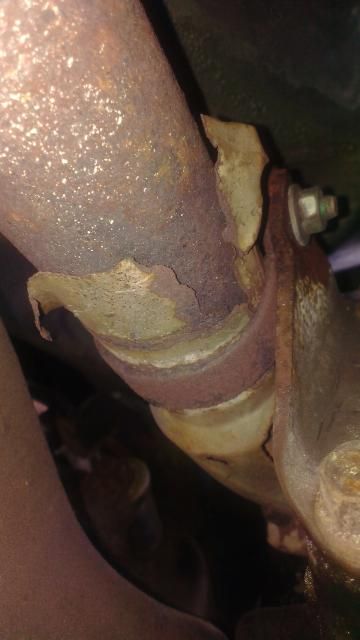
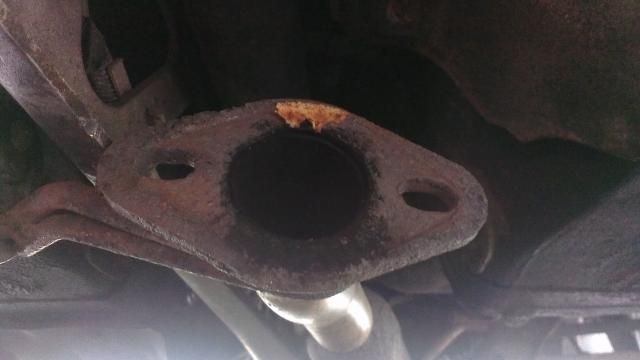
The only other thing I noticed was that the exhaust is blowing at the bottom of the joint between the CAT and the rear section. Pooey 
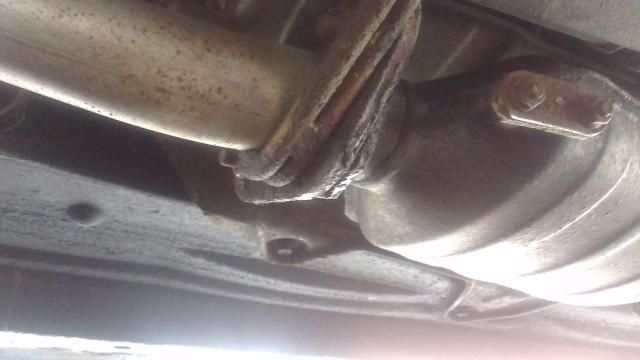
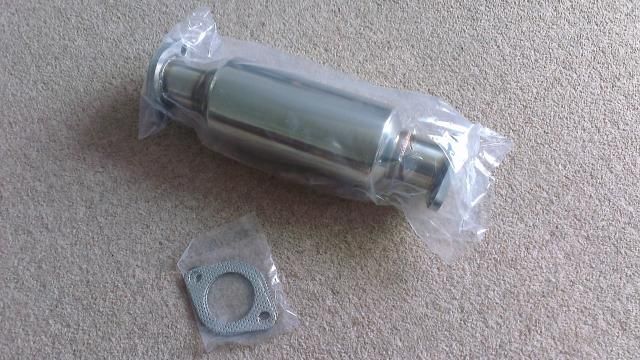
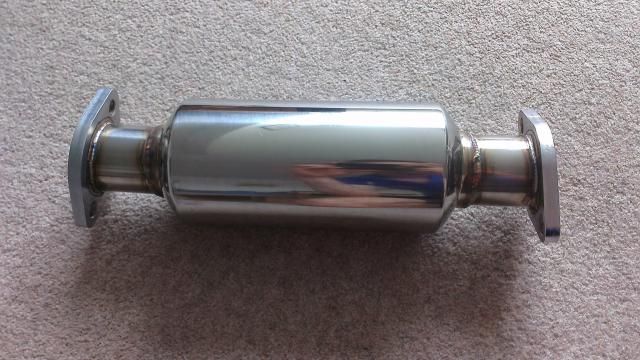
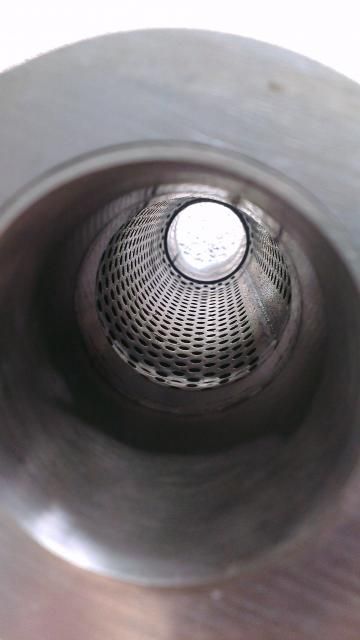
This evening I've managed to pick up a new decat for just under £40 on eBay  Seem to be out of stock in a lot of places for the size I need. The only ones I could find were twice the price! So bit of a bargain there. I couldn't find any that seemed to be fully silenced, but it's at least one of the slightly more muffled ones as in the picture below, as opposed to a fully bare straight pipe: Seem to be out of stock in a lot of places for the size I need. The only ones I could find were twice the price! So bit of a bargain there. I couldn't find any that seemed to be fully silenced, but it's at least one of the slightly more muffled ones as in the picture below, as opposed to a fully bare straight pipe:
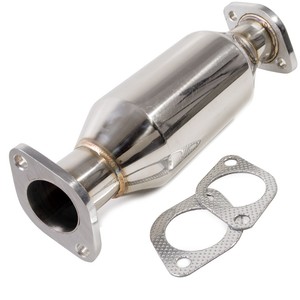
Hoping it doesn't really add much volume but with the rest of the system standard I'm keeping my finger's crossed the increase in volume is reasonable; I've read conflicting things so I'll just have to wait and see! Not sure when I'll get a chance to fit it, depends if it arrives on or before this weekend.
It'll at least help to sort the blow, and finger's crossed stop the rattle!
MX5 Project Thread
|
nibnob21
Premium Member
 Registered: 16th May 10
Location: South Derbyshire
User status: Offline
|
Shiny things 
MX5 Project Thread
|
nibnob21
Premium Member
 Registered: 16th May 10
Location: South Derbyshire
User status: Offline
|
After a further look into things, I think it may be gear lash causing the occasional rattle. Slightly annoying as there's nothing I can do about it, but it's not that bad and only rattles occasionally. It's a fairly common thing on MX5s and is caused when the gearbox isn't put back in quite right if it's had work done on it. A very delicate and precise art refitting them apparently. Once the rattling has started the damage is done, however the good news is that it doesn't actually cause any issues and shouldn't get any worse. Just something I'll have to live with.
Came to this conclusion after a bit of research and after taking it for a couple of drives to really try and pin point when the rattle occurs etc. Also, inspecting the gearbox mounting points it's apparent that some work has been done on it in the past as there are some faint marks where the bolts have been tightened up before. So my guess is it just wasn't put back in quite right. Oh well.
This therefore obviously means there was nothing wrong with the CAT, but seeing as I've already bought the decat and I needed to sort the blow anyway I set about fitting it today.
Bit of PlusGas and much to my surprise and delight the nuts came undone pretty easily! I'm always sceptical when things go to plan and get nervous that something's inevitably going to go wrong 
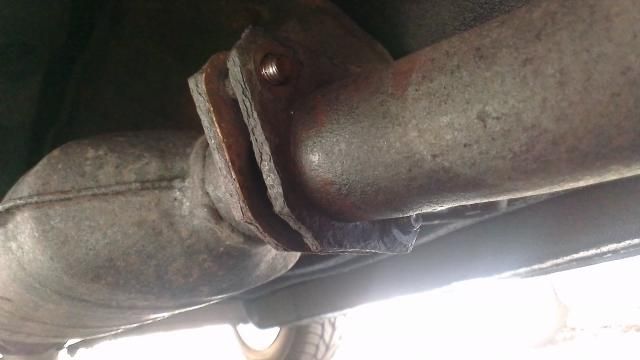
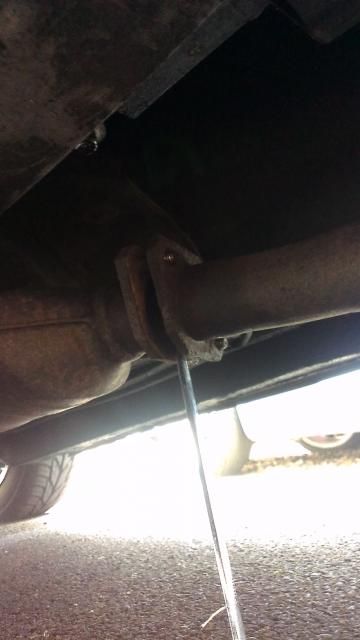
Prised the CAT out with a spanner:
Sooty deposit on the rear section flange; evidence of the blow:
Sooty CAT flange:
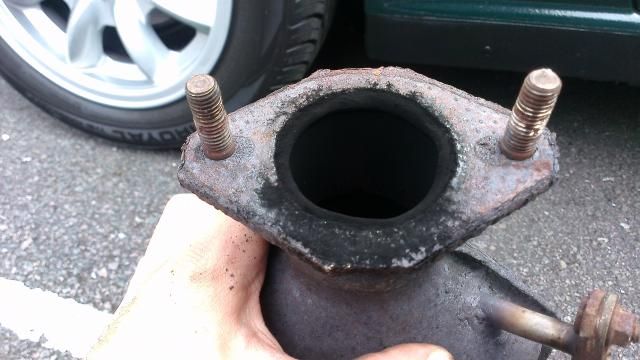
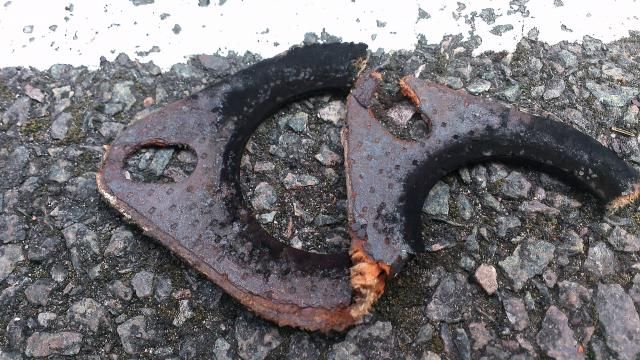
Gasket on the blowing end was fudged:
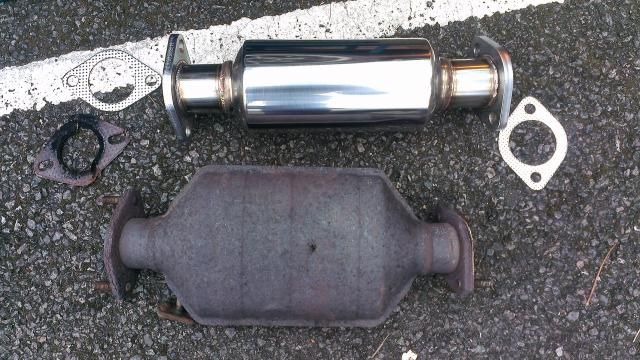
Decat against old CAT:
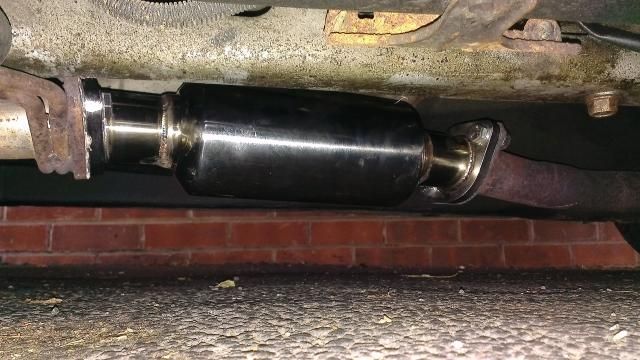
Got the new one bolted on with relative ease. I used M10 x 30mm stainless bolts, which in hindsight may be a little short. Only about one turn of thread is coming out the end of the nuts, hopefully it'll be fine. I just used standard penny washers and regular nuts. Keeping my finger's crossed they don't work loose.
I couldn't manage to get the face of the rear section flange completely clean so I used a small amount of exhaust putty to help it seal. Seems to have worked nicely. The downpipe flange joint I just used the gasket and it seems like it may not have fully sealed, very very minimal though. Still a bit annoying, but I really can't be bothered right now to undo it again to add a bit of putty.
Seems to be absolutely zero noise difference, which I was actually slightly disappointed with  I didn't want anything lairy at all, but perhaps just a small noise increase, or hell even just a little burble on overrun would be nice; but no, nothing lol. I didn't want anything lairy at all, but perhaps just a small noise increase, or hell even just a little burble on overrun would be nice; but no, nothing lol.
MX5 Project Thread
|
nibnob21
Premium Member
 Registered: 16th May 10
Location: South Derbyshire
User status: Offline
|
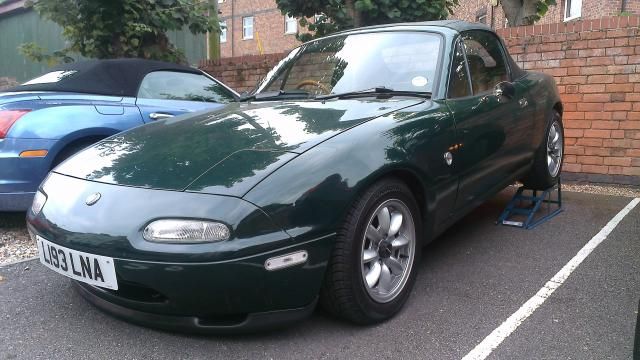
Had the car back up on the ramps to fit some longer bolts, nylocs and serrated washers for the decat. Gave me the chance to use exhaust putty on both joints too.
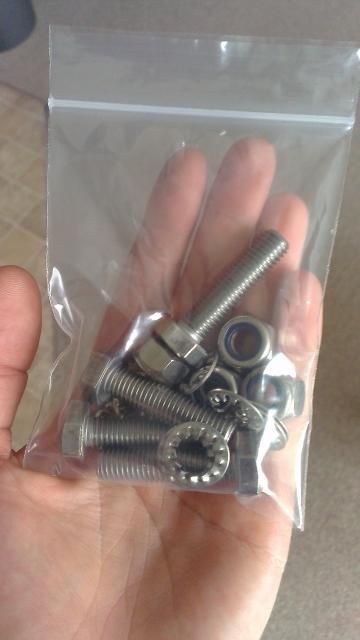
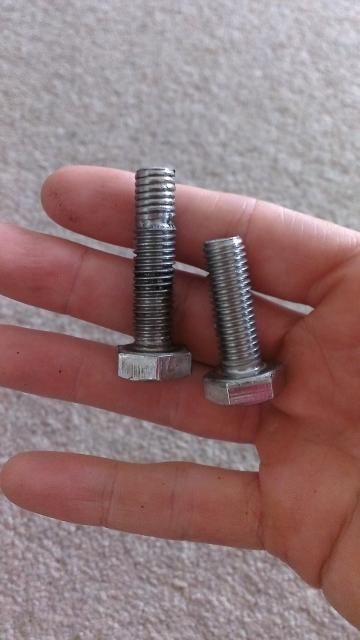
As you can see here there really wasn't much thread coming through from the 30 mm length bolts. And with normal penny washers and nuts it was only going to be a matter of time before they worked their way loose.
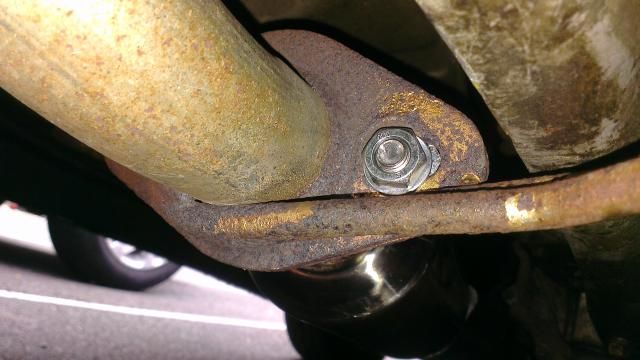
It was all going swimmingly until, don't ask me how, one of the new nuts cross threaded. It took me a bit over an hour to get it removed  Absolutely no space to manoeuvre under the car and too small a space to get the angle grinder in without damaging other bits of the car. Absolutely no space to manoeuvre under the car and too small a space to get the angle grinder in without damaging other bits of the car.
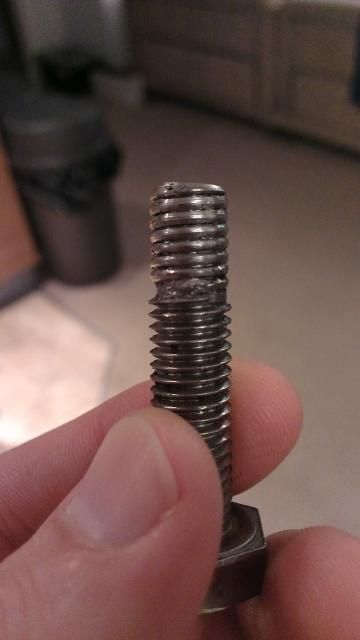
Got them all changed over eventually. Lot more length on the new bolts:
MX5 Project Thread
|
nibnob21
Premium Member
 Registered: 16th May 10
Location: South Derbyshire
User status: Offline
|
I may have accidentally taken about a gazillion photos when I was out yesterday...


MX5 Project Thread
|
djgritt
Premium Member
 Registered: 1st Nov 07
Location: Dorset Drives: Focus ST / Hyundai i20N
User status: Offline
|
Looking good.
|
boylers11
Member
Registered: 27th Jul 06
Location: Shropshire
User status: Offline
|
Photos and car look great! Loving the attention to detail. The multiple small touches have made a massive difference. Are those mirrors standard? They're the only bit I'm not sure about! Keep the progress updates coming
|


