Skipz
Member
Registered: 23rd Aug 03
Location: Falkirk: Drives:nothing but gettin another Corsa
User status: Offline
|
Here you go Guys...
LICENSE EXAMS:
B(Bronze) : VOLKSWAGEN Lupo 1.4 '02
B(Silver) : MAZDA KUSABI '03
B(Gold) : HONDA S500 '63
A(Bronze) : PONTIAC Sunfire GXP Concept '02
A(Silver) : ACURA DN-X '02
A(Gold) : NISSAN SKYLINE GT-R (Gran Turismo Version) '01
IB(Bronze) : NIKE One 2022
IB(Silver) : MAZDA RX-8 Concept (Type-II) '04
IB(Gold) : JENSEN HEALEY Interceptor Mk.III '74
IA(Bronze) : NISMO 270R '94 (S14)
IA(Silver) : NISSAN GT-R Concept (TokyoShow) '01
IA(Gold) : DOME ZERO '78
S(Bronze) : MERCURY Cougar XR-7 '67
S(Silver) : PONTIAC Solstice Coupe Concept '02
S(Gold) : FORD Model T Tourer '15
BEGINNER HALL:
Sunday Cup : AUTOBIANCHI A112 Abarth '79
FF Challenge : MAZDA Mazda6 Concept '01
FR Challenge : NISSAN Skyline 2000GT-B '67
4WD Challenge : TOYOTA Motor Triathlon Race Car '04
MR Challenge : LOTUS Esprit Turbo HC '87
Light Weight K Cup : GINETTA G4 '64
Spider & Roadster : CHRYSLER Prowler '02
Sport Truck Race : CHEVROLET Silverado SST Concept '02
PROFESSIONAL HALL:
Clubman Cup : MAZDA Mazdaspeed 6 '05
Tuning Car Grand Prix : NISSAN OPTION Stream Z '04
Race of NA Sports : HONDA NSX-R Concept '01
Race of Turbo Sports : MAZDA BP FALKEN RX-7 (D1GP) '03
Boxer Spirit : RUF CTR Yellow Bird '87
World Classic Car Series : MERCEDES-BENZ Daimler Motor Carriage '1886
World Compact Car Race : HONDA S800 RSC Race Car '68
Supercar Festival : CIZETA V16T '94
Gran Turismo World Championship : FORD GT LM Edition Spec-II '04
EXTREME HALL:
Gran Turismo All Stars : BMW MacLaren F1 GTR Race Car '97
Dream Car Championship : NISSAN GT-R Concept LM Race Car '02
Polyphony Digital Cup : OPERA PERFORMANCE S2000 '04
Like The Wind : VOLKSWAGEN W12 Nardo Concept '01
Formula GT World : MERCEDES-BENZ Sauber C9 Race Car '89
Real Circuit Tours : NISSAN GRAN TURISMO SKYLINE GT-R (PaceCar) '01
Premium Sports Lounge : FORD GT '05
ENDURANCE HALL:
Grand Valley 300km : AUDI Auto Union V16 Type C Streamline '37
Laguna Seca 200 Miles : FORD GT40 Race Car '69
Roadster 4 Hours Endurance : MAZDA RX-7 LM Race Car '01
Tokyo R246 300km : MITSUBISHI FTO Super Touring Car '97
Super Speedway 150 Miles : HONDA NSX-R Prototype LM Race Car '02
Nurburgring 24 Hours Endurance : POLYPHONY Formula Gran Turismo '04
Nurburgring 4 Hours Endurance : CHAPPARAL 2D Race Car '67
Suzuka 1000km : LISTER Storm V12 Race Car '99
Motegi 8 Hours Endurance : HONDA NSX-R LM Edition Road Car '02
Tsukuba 9 Hours Endurance : NISSAN SKYLINE GT-R Race Car (CALSONIC) '93
Sarthe Circuit 24 Hours I : AUDI R8 '01
Sarthe Circuit 24 Hours II : BENTLEY Speed 8 Race Car '03
Fuji 1000km : NISSAN R92CP Race Car '92
Infineon World Sport Car Trophy : FORD GT LM Race Car '02
El Captain 200 Miles : TOYOYTA 88C-V Race Car (MINOLTA) '89
New York 200 Miles : DODGE Charger Super Bee 426 Hemi '71
MISSION HALL:
Mission 1-10 : DMC DeLorean S2 '04
Mission 11-20 : JAY LENO Tank Car '03
Mission 21-24 : PAGANI Zonda Race Car '01
Mission 25-29 : TOYOTA 7 Race Car '70
Mission 30-34 : NISSAN R89C Race Car '89
JAPANESE HALL:
Japanese Championship : NISSAN 350Z Concept LM Race Car '02
Japanese GT Championship : NISSAN MOTUL PITWORK Z (JGTC) '04
Japanese 70's Classic : NISSAN SKYLINE Hard Top 2000GT-R (KPGC10) '70
Japanese 80's Festival : MITSUBISHI HSR-II Concept '89
Japanese 90's Challenge : NISMO 400R (R33) '96
Japanese Compact Car Cup : HONDA LIFE STEP VAN '72
EUROPEAN HALL:
European Championship : JAGUAR XJ220 LM Edition '01
British GT Cup : JAGUAR E-Type Coupe '61
British Light Weight Car Race : LOTUS Europa Special '71
German Touring Car Championship : MERCEDES-BENZ AMG CLK-GTR Race Car '98
Italian Festival : ALFA ROMEO 155 2.5 V6 TI Race Car '93
French Championship : CITROEN 2CV Type-A '54
European Classic Car Championship : MERCEDES-BENZ Benz Patent Motor Wagen '1886
European Hot Hatch Car Championship : VOLVO 240 GLT Estate '88
1000 Miles : ALFA ROMEO Giulia Sprint Speciale '63
Schwarzwald Liga A : BMW M3 GTR Race Car '01
Schwarzwald Liga B : MERCEDES-BENZ AMG 190E 2.5 16V Evolution II (DTM) '92
AMERICAN HALL:
American Championship : CHEVROLET Corvette Convertible (C1) '54
Stars and Stripes : CHEVROLET Camaro LM Race Car '01
American Muscle Car Championship : CHEVROLET Chevelle SS 454 '70
Classic Muscle Car Championship : PLYMOUTH Super Bird '70
SPECIAL CONDITION HALL (EASY):
Umbria Rally : CADILLAC CIEN '02
Capri Rally : TOYOTA RSC Rally Raid Car '02
Grand Canyon : FORD RS200 '84
Ice Arena : TOYOTA RSC '01
Chamonix : INFINITI FX45 Concept '02
George V Paris : ALPINE A310 1600VE '73
Swiss Alps : MITSUBISHI CZ-3 Tarmac '01
Tahiti : RENAULT 5 Turbo '80
Tsukuba Circuit : MAZDA RX-8 Concept (Type-I) '01
Cathedral Rocks Trail I : LAND ROVER Range Stormer Concept '04
Cathedral Rocks Trail II : HYUNDAI HCD6 '01
SPECIAL CONDITION HALL (NORMAL):
Umbria Rally : LANCIA Delta HF Integrale Rally Car '92
Capri Rally : SUBARU IMPREZA Rally Car Prototype '01
Grand Canyon : MITSUBISHI CZ-3 Tarmac Rally Car '02
Ice Arena : MITSUBISHI Lancer Evolution IV Rally Car'97
Chamonix : SUBARU IMPREZA Rally Car '01
George V Paris : RENAULT 5 Maxi Turbo Rally Car '85
Swiss Alps : TOYOTA CELICA GT-FOUR Rally Car (ST205) '95
Tahiti : FORD Escort Rally Car '98
Tsukuba Circuit : MAZDA 6 Touring Car '02
Cathedral Rocks Trail I : SUBARU IMPREZA Rally Car '99
Cathedral Rocks Trail II : TOYOTA CELICA GT-FOUR Rally Car (ST185) '95
SPECIAL CONDITION HALL (HARD):
Umbria Rally : LANCIA Delta S4 Rally Car '85
Capri Rally : FORD RS200 Rally Car '85
Grand Canyon : MITSUBISHI STRAION 4WD Rally Car '84
Ice Arena : NISSAN BLUEBIRD 1600SSS Rally Car (510) '69
Chamonix : LANCIA STRATOS Rally Car '77
George V Paris : PEUGEOT 205 Turbo 16 Evolution 2 Rally Car '86
Swiss Alps : NISSAN SILVIA 240RS Rally Car '85
Tahiti : MITSUBISHI PAJERO Rally Raid Car '85
Tsukuba Circuit : FORD GT Concept '02
Cathedral Rocks Trail I : SUZUKI ESCUDO Dirt Trial Car '98
Cathedral Rocks Trail II : MITSUBISHI PAJERO Evolution Rally Raid Car '03
One-Make Races
--------------
DAIHATSU:
Copen Race : DAIHATSU STORIA X4 '00
Midget II Race : DAIHATSU Midget '63
HONDA:
Type R Meeting : HONDA HSC (Honda Sports Concept) '03
CIVIC Race : HONDA CIVIC Si (Mugen Motul Race Car) '87
HYUNDAI:
Hyundai Sport Festival : HYUNDAI Clix '01
ISUZU:
Isuzu Classic Sport : ISUZU 117 Coupe '68
MAZDA:
'RE' Club : MAZDA Cosmo Sport (L10A) '67
Roadster Cup : MAZDA MX-Crossport '05
RX-8 Cup : MAZDA RX-8 Concept LM Race Car '01
MITSUBISHI:
Evolution Meeting : MITSUBISHI Lancer 1600 GSR Rally Car '74
Mirage Cup : MITSUBISHI I Concept '03
NISSAN:
Race of Red Emblem : NISMO SKYLINE GT-R LM Road Going Version (R33) '95
March Brothers : NISSAN mm-R Cup Car '01
Silvia Sisters : NISSAN Sileighty '98
'Z' Club : NISSAN Fairlady 240ZG (HS30) '71
SUBARU:
Subaru 360 Race : SUBARU 360 '58
Race of Pleiades : SUBARU IMPREZA Super Touring Car '01
SUZUKI:
Suzuki K Cup : SUZUKI CONCEPT-S2 '03
Suzuki Concept Car : SUZUKI GSX-R/4 '01
TOYOTA:
ALTEZZA Race : TOYOTA ALTEZZA Touring Car '01
Vitz Race : TOYOTA Vitz RS Turbo '02
CHEVROLET:
Corvette Festival : CHEVROLET Corvette Z06 (C2) Race Car '63
Camaro Meeting : CHEVROLET Camaro IROC-Z Concept '88
CHRYSLER:
Crossfire Trophy : DODGE VIPER GTSR Concept '00
SALEEN:
Saleen S7 Club : NIKE One 2022
SHELBY:
Shelby Cobra Cup : SHELBY Mustang G.T.350R '65
ALFA ROMEO:
GTA Cup : ALFA ROMEO Giulia Sprint GTA 1600 '65
ALPINE:
Renault Alpine Cup : ALPINE A110 1600S '73
ASTON MARTIN:
Aston Martin Festival : ASTON MARTIN DB9 Coupe '03
AUDI:
Tourist Trophy : AUDI Le Mans Quattro '03
A3 Cup : AUDI Pikes Peak quattro '03
BMW:
BMW 1 Series Trophy : BMW 2002 Turbo '73
'M' Club : BMW M3 GTR '03
CITROEN:
2HP-2CV : CITROEN 2CV Type-A '54
LOTUS:
Elise Cup : LOTUS Elise Type-72 '01
Lotus Classic Cup : LOTUS Elan S1 '62
MERCEDES-BENZ:
Legend of Silver Arrow : MERCEDES-BENZ CLK Touring Car (D2 DTM) '00
SL Challenge : MERCEDES-BENZ 300 SL Coupe '54
MG:
MG Festival : MGF '97
MINI:
Mini.Mini Battle : MARCOS Mini Marcos GT '70
OPEL:
Speedster Cup : OPEL Calibra Touring Car (DTM) '94
PEUGEOT:
206 Cup : PEUGOET 205 Turbo 16 Rally Car '85
RENAULT:
Clio Trophy : RENAULT Lutecia Renault Sport V6 24V Race Car '00
Megane Cup : RENAULT AVANTIME '02
TRIUMPH:
Spitfire Cup : TRIUMPH Spitfire 1500 '74
TVR:
Blackpool Racer : TVR Cerbera Speed 12 '00
VOLKSWAGEN:
Beetle Cup : VOLKSWAGEN Beetle 1100 Standard (Type-11) '49
Lupo Cup : VOLKSWAGEN Karmann Ghia Coupe (Type-1) '68
GTI Cup : VOLKSWAGEN Golf I GTI '76
25% Game Completion : AUDI Nuvolari quattro '03
50% Game Completion : JAGUAR XJR-9 Race Car '88
100% Game Completion: POLYPHONY Formula Gran Turismo '04 (black
[Edited on 31-05-2005 by h18_oab]
|
Skipz
Member
Registered: 23rd Aug 03
Location: Falkirk: Drives:nothing but gettin another Corsa
User status: Offline
|
730 Cars from 77 Manufacturers and 10 Tuners
Hope this Lists all the cars now if i've missed any feel free to add them below and I'll get them into the list!
ENJOY 
car-list
Asia
ACURA :
2001 : CL 3.2 Type-S
2003 : CL 3.2 Type-S
2001 : Integra Type-R
1991 : NSX
1997 : NSX
2004 : NSX
2001 : RSX Type-S
ASL:
2002 : Garaiya
2003 : Garaiya (ARTA JGTC)
DAIHATSU:
2002 : Copen Active Top
2002 : Copen Detachable Top
1963 : Midget
1998 : Midget II D-type
1997 : MIRA TR-XX Avanzato R
2002 : MOVE Custom RS Limited
1995 : MOVE CX
1997 : MOVE SR-XX 2WD
1997 : MOVE SR-XX 4WD
1998 : STORIA CX 2WD
1998 : STORIA CX 4WD
2000 : STORIA X4
DOME:
1978 : ZERO
FORD:
2000 : Falcon XR8 Race Car
FPV:
2004 : F6 Typhoon
2004 : GT
HOLDEN:
2004 : Commodore SS Series II
2004 : Monaro CV8
HONDA:
1970 : 1300 Coupe 9 S
1988 : ACCORD Coupe (US)
2003 : ACCORD Coupe EX V6 (US)
2000 : ACCORD Euro-R
2002 : ACCORD Euro-R
1991 : BEAT
1992 : BEAT Version F
1993 : BEAT Version Z
1983 : CITY Turbo II
1983 : CIVIC 1500 3door 25i
1979 : CIVIC 1500 3door CX
1987 : CIVIC Si (Mugen Motul Race Car)
1991 : CIVIC SiR-II (EG)
1992 : CIVIC SiR-II (EG)
1993 : CIVIC SiR-II (EG)
1995 : CIVIC SiR-II (EG)
1997 : CIVIC Type-R (EK)
1998 : CIVIC Type-R (EK)
2001 : CIVIC Type-R (EP)
2004 : CIVIC Type-R (EP)
1998 : CIVIC Race Car (Gathers Drider)
1983 : CRX 1.5i (BALLARD Sport)
1992 : CRX del Sol SiR
1990 : CRX SiR
2001 : DUALNOTE (V6 IMA MID)
2003 : ELEMENT
2001 : Fit W
2003 : HSC (Honda Sports Concept)
1999 : Insight HYBRID
1995 : INTEGRA Type-R (DC2)
1998 : INTEGRA Type-R (DC2)
1999 : INTEGRA Type-R (DC2)
2001 : INTEGRA Type-R (DC5)
2003 : INTEGRA Type-R (DC5)
2002 : INTEGRA Type-R Touring Car
1972 : LIFE STEP VAN
1967 : N360
1990 : NSX
1993 : NSX
1995 : NSX
1997 : NSX
1999 : NSX
2001 : NSX
1992 : NSX Type-R
2002 : NSX Type-R
1997 : NSX Type-S
1999 : NSX Type-S
2001 : NSX Type-S
1997 : NSX Type-S Zero
1999 : NSX Type-S Zero
2000 : NSX (ARTA JGTC)
2000 : NSX (Castrol MUGEN JGTC)
2000 : NSX (RAYBRIG JGTC)
2001 : NSX (LOCTITE MUGEN JGTC)
2001 : NSX (Mobil 1 JGTC)
2003 : NSX (TAKATA DOME JGTC)
2001 : NSX-R Concept
2002 : NSX-R LM Edition Road Car
2002 : NSX-R LM Edition Race Car
2003 : Odyssey
1991 : PRELUDE Si VTEC
1996 : PRELUDE SiR
1998 : PRELUDE SiR S spec
1996 : PRELUDE Type-S
1998 : PRELUDE Type-S
1963 : S500
1964 : S600
1966 : S800
1968 : S800 RSC Race Car
1999 : S2000
2001 : S2000
2003 : S2000
2000 : S2000 Type V
2001 : S2000 Type V
2003 : S2000 Type V
2001 : S2000 LM Race Car
2000 : S2000 (MUGEN)
1985 : TODAY G
1970 : Z ACT
HYUNDAI:
2001 : Accent Rally Car
2001 : Clix
2001 : Hyundai Coupe FX
2001 : HCD6
ISUZU:
1968 : 117 Coupe
1969 : Bellett 1600 GT-R
1981 : PIAZZA XE
MAZDA:
1991 : 787B Race Car
2001 : Atenza Concept
2003 : Atenza Sports 23Z
2005 : Atenza Mazdaspeed
2002 : Atenza Touring Car
1992 : Autozam AZ-1
1962 : Carol 360 Deluxe
1967 : Cosmo Sport (L10A)
1968 : Cosmo Sport (L10B)
1999 : DEMIO GL-X
2003 : DEMIO SPORT
1989 : Eunos Roadster 1.6
1998 : Eunos Roadster 1.8 RS
2000 : Eunos Roadster 1800 RS
1991 : Eunos Roadster J-Limited (NA)
1993 : Eunos Roadster J-Limited II
1997 : Eunos Roadster SR-Limited
1995 : Eunos Roadster S-Special Type-I (NA)
1993 : Eunos Roadster V-Special
1995 : Eunos Roadster VR-Limited
1994 : Mazda 323F
2002 : Familia Sedan Sport 20
2003 : KUSABI
1993 : Lantis Coupe 2000 Type-R
1998 : ROADSTER 1.8 RS
2004 : ROADSTER 1800 RS (NB)
2004 : ROADSTER 1600 NR-A (NB)
1985 : SAVANNA RX-7 GT-Limited (FC)
1990 : SAVANNA RX-7 GT-X (FC)
1990 : SAVANNA RX-7 INFINI III (FC)
1991 : RX-7 efini Type R (FD)
1993 : RX-7 efini Type R (FD)
1995 : RX-7 efini Type RS (FD)
1996 : RX-7 efini Type RS (FD)
1992 : RX-7 efini Type RZ (FD)
1993 : RX-7 efini Type RZ (FD)
1995 : RX-7 efini Type RZ (FD)
1996 : RX-7 efini Type RZ (FD)
2000 : RX-7 efini Type RZ (FD)
2001 : RX-7 LM Race Car
1998 : RX-7 Type RS (FD)
2000 : RX-7 Type RS (FD)
1997 : RX-7 Type RS-R (FD)
2002 : RX-7 Spirit-R Type-A (FD)
2001 : RX-7 Type-R Bathurst-R (FD)
2003 : RX-8
2001 : RX-8 Concept (Type-I)
2001 : RX-8 Concept (Type-II)
2001 : RX-8 Concept LM Race Car
2003 : RX-8 Type-E
2003 : RX-8 Type-S
MITSUBISHI:
2002 : AIRTREK Turbo-R
2002 : COLT 1.5 Sport X Version
2001 : CZ-3 Tarmac
2002 : CZ-3 Tarmac Rally Car
1995 : ECLIPSE GT
2003 : ECLIPSE Spyder GTS
1997 : FTO GP Version R
1999 : FTO GP Version R
1994 : FTO GPX
1997 : FTO GPX
1999 : FTO GPX
1994 : FTO GR
1997 : FTO GR
1997 : FTO Super Touring Car
1989 : GALANT 2.0 Turbo VR-4
1970 : GALANT GTO MR
1995 : GTO SR
1996 : GTO SR
1998 : GTO SR
1995 : GTO Twin Turbo
1996 : GTO Twin Turbo
1998 : GTO Twin Turbo
1995 : GTO Twin Turbo MR
1998 : GTO Twin Turbo MR
1989 : HSR-II Concept
2003 : i Concept
1973 : Lancer 1600 GSR
1974 : Lancer 1600 GSR Rally Car
1992 : Lancer Evolution GSR
1994 : Lancer Evolution II GSR
1995 : Lancer Evolution III GSR
1996 : Lancer Evolution IV GSR
1997 : Lancer Evolution IV Rally Car
1998 : Lancer Evolution V GSR
1999 : Lancer Evolution VI GSR
1999 : Lancer Evolution VI GSR T.M.E.
1999 : Lancer Evolution VI Rally Car
1999 : Lancer Evolution VI RS
1999 : Lancer Evolution VI RS T.M.E.
2001 : Lancer Evolution VII GSR
2002 : Lancer Evolution VII GT-A
2001 : Lancer Evolution VII RS
2003 : Lancer Evolution VIII MR
2003 : Lancer Evolution VIII GSR
2003 : Lancer Evolution VIII RS
2004 : Lancer Evolution VIII MR GSR
2003 : Lancer Evolution Super Rally Car
1983 : Lancer EX 1800GSR IC Turbo
1998 : LEGNUM VR-4 Type-V
1989 : MINICA DUNGUN ZZ
1978 : MIRAGE 1400GLX
1997 : MIRAGE CYBORG ZR
1985 : PAJERO Rally Raid Car
2003 : PAJERO Evolution Rally Raid Car
1984 : STARION 4WD Rally Car
NISSAN:
1994 : NISMO 270R (S14)
1996 : NISMO 400R (R33)
2002 : NISMO Fairlady Z S-tune Aero concept by GRAN TURISMO (Z33)
2003 : NISMO Fairlady Z Z-tune (Z33)
2000 : NISMO Skyline GT-R S-tune (R32)
1995 : NISMO Skyline GT-R LM Road Going Version (R33)
1999 : NISMO Skyline GT-R R-tune (R34)
1996 : 180SX Type-X
1987 : Be-1
1969 : BLUEBIRD 1600 Deluxe (510)
1969 : BLUEBIRD 1600SSS Rally Car (510)
1979 : BLUEBIRD 1800SSS Hardtop
1998 : Cube X
2002 : CUBE EX (FF/CVT)
1988 : EXA CANOPY L.A.Version Type-S (N13)
1968 : Fairlady 2000 (SR311)
1971 : Fairlady 240ZG (HS30)
1978 : Fairlady Z 280Z-L 2seater (S130)
1983 : Fairlady Z 300ZX (Z31)
1989 : Fairlady Z TT 2seater (Z32)
1998 : Fairlady Z Ver.R TT 2by2 (Z32)
1998 : Fairlady Z Ver.S TT 2seater (Z32)
2005 : 350Z Gran Turismo 4 Limited Edition (Z33)
2002 : Fairlady Z Concept LM Race Car (Z33)
2002 : Fairlady Z Version S (Z33)
2002 : Fairlady Z Version ST (Z33) Option Wheel
2003 : Fairlady Z Roadster (Z33)
2004 : Z (MOTUL PITWORK JGTC)
2004 : Z (OPTION Stream)
2001 : GT-R Concept (TokyoShow)
2002 : GT-R Concept LM Race Car
2003 : March 12c 5door
1999 : March G#
2001 : mm-R Cup Car
1989 : PAO
1990 : PRIMERA 2.0Te
2001 : PRIMERA 20V
1998 : R390 GT1 Road Car
1998 : R390 GT1 Race Car
1989 : R89C Race Car
1992 : R92CP Race Car
1998 : Sileighty
1965 : SILVIA (CSP311)
1983 : SILVIA 240RS (S100)
1985 : SILVIA 240RS Rally Car
1993 : SILVIA 2000K's AERO (S13)
1988 : SILVIA K's (S13)
1991 : SILVIA K's (S13)
1993 : SILVIA K's AERO (S14)
1996 : SILVIA K's AERO (S14)
1991 : SILVIA 1800Q's (S13)
1988 : SILVIA Q's (S13)
1991 : SILVIA Q's (S13)
1993 : SILVIA Q's AERO (S14)
1996 : SILVIA Q's AERO (S14)
1999 : SILVIA spec-R AERO (S15)
1999 : SILVIA spec-S AERO (S15)
2000 : SILVIA Varietta (S15)
2001 : SILVIA (S15)(C-WEST RAZO JGTC)
1962 : SKYLINE Sport Coupe (BLRA-3)
1963 : SKYLINE 1500Deluxe (S50D-1)
1967 : SKYLINE 2000GT-B (S54A)
1970 : SKYLINE 2000GT-R Hard Top (KPGC10)
1973 : SKYLINE 2000GT-R (KPGC110)
1984 : SKYLINE 2000 RS-X Type-C (R30)
1983 : SKYLINE HT 2000 Turbo RS (R30)
1987 : SKYLINE GTS-R (R31)
1989 : SKYLINE GTS-t Type-M (R32)
1991 : SKYLINE GTS-t Type-M (R32)
1991 : SKYLINE GTS25 Type-S (R32)
1989 : SKYLINE GT-R (R32)
1991 : SKYLINE GT-R (R32)
1995 : SKYLINE GT-R (R33)
1996 : SKYLINE GT-R (R33)
1997 : SKYLINE GT-R (R33)
1999 : SKYLINE GT-R (R34)
2000 : SKYLINE GT-R (R34)
1999 : SKYLINE GT-R Special Color Midnight Purple II (R34)
2000 : SKYLINE GT-R Special Color Midnight Purple III (R34)
2001 : SKYLINE GT-R M-spec (R34)
2002 : SKYLINE GT-R M-spec Nur (R34)
1991 : SKYLINE GT-R N1 (R32)
1995 : SKYLINE GT-R N1 (R33)
1993 : SKYLINE GT-R Vspec (R32)
1995 : SKYLINE GT-R Vspec (R33)
1996 : SKYLINE GT-R Vspec (R33)
1997 : SKYLINE GT-R Vspec (R33)
1999 : SKYLINE GT-R Vspec (R34)
1996 : SKYLINE GT-R Vspec LM Edition (R33)
1993 : SKYLINE GT-R Vspec N1 (R32)
1995 : SKYLINE GT-R Vspec N1 (R33)
1999 : SKYLINE GT-R Vspec N1 (R34)
1994 : SKYLINE GT-R Vspec II (R32)
2000 : SKYLINE GT-R Vspec II (R34)
2000 : SKYLINE GT-R Vspec II N1 (R34)
2002 : SKYLINE GT-R Vspec II Nur (R34)
1993 : SKYLINE GT-R Race Car (CALSONIC)
1999 : SKYLINE GT-R (PENNZOIL Nismo JGTC)
2000 : SKYLINE GT-R (CALSONIC JGTC)
2000 : SKYLINE GT-R (LOCTITE ZEXEL JGTC)
2001 : SKYLINE GT-R (Gran Turismo Version)
2001 : SKYLINE GT-R (GRAN TURISMO PaceCar)
2001 : SKYLINE GT-R (PENNZOIL ZEXEL JGTC)
2001 : SKYLINE GT-R (XANAVI HIROTO JGTC)
2003 : SKYLINE GT-R (XANAVI NISMO JGTC)
2004 : SKYLINE GT-R (FALKEN Race Car)
2001 : SKYLINE SEDAN 300GT
2002 : SKYLINE SEDAN 350GT-8
2003 : SKYLINE COUPE 350GT
1998 : STAGEA 25t RS FOUR S
1998 : STAGEA 260RS AutechVersion
POLYPHONY:
2004 : Formula Gran Turismo
PROTOMOTORS :
2004 : Spirra 4.6 V8
SUBARU:
1958 : SUBARU 360
2001 : IMPREZA Prodrive Style
1999 : IMPREZA Rally Car
2001 : IMPREZA Rally Car
2003 : IMPREZA Rally Car
2001 : IMPREZA Rally Car Prototype
1998 : IMPREZA STi 22B Coupe
1996 : IMPREZA WRX STi (Version III)
1997 : IMPREZA WRX STi (Version IV)
1999 : IMPREZA WRX STi Coupe type R Version VI (GC)
1994 : IMPREZA WRX STi Sedan
1995 : IMPREZA WRX STi Sedan (Version II)
1998 : IMPREZA WRX STi Sedan (Version V)
2000 : IMPREZA WRX STi Sedan (GD, Type-I)
2002 : IMPREZA WRX STi Sedan (GD, Type-II))
2004 : IMPREZA WRX STi Sedan spec C (GD, Type-II)
2000 : IMPREZA WRX STi Wagon
2003 : IMPREZA (CUSCO SUBARU ADVAN JGTC)
2003 : LEGACY B4 2.0GT
2003 : LEGACY B4 2.0GT specB
2003 : LEGACY B4 3.0R
2000 : LEGACY B4 Blitzen
1998 : LEGACY B4 RSK
1996 : LEGACY Touring Wagon GT-B
2003 : LEGACY Touring Wagon 2.0GT
2003 : LEGACY Touring Wagon 2.0GT specB
2003 : LEGACY Touring Wagon 3.0R
SUZUKI:
2002 : ALTO LAPIN Turbo
1997 : ALTO WORKS SUZUKI SPORT LIMITED
1991 : Cappuccino (EA11R)
1995 : Cappuccino (EA21R)
2003 : CONCEPT-S2
1998 : ESCUDO Dirt Trial Car
2001 : GSX-R/4
2002 : Kei WORKS
2004 : MR Wagon Sport
1998 : WAGON R RR
TOMMY KAIRA:
2000 : ZZ-S
2000 : ZZII
TOYOTA:
2000 : Modellista CELICA TRD Sports M (ZZT231)
1967 : 2000GT
1970 : 7 Race Car
1989 : 88C-V Race Car (MINOLTA)
1998 : ALTEZZA AS200
1998 : ALTEZZA RS200
2001 : ALTEZZA Gita AS300
2001 : ALTEZZA Touring Car
1991 : ARISTO 3.0V
2000 : ARISTO V300
2000 : ARISTO V300 Vertex Edition
2000 : bB 1.5Z X Version
2002 : CALDINA GT-FOUR
1989 : CARINA ED 2.0 X 4WS
1970 : CELICA 1600GT (TA22)
1986 : CELICA 2000GT-FOUR (ST165)
1986 : CELICA 2000GT-FOUR RC (ST165)
1986 : CELICA 2000GT-R (ST162)
1998 : CELICA GT-FOUR (ST205)
1991 : CELICA GT-FOUR RC (ST185)
1995 : CELICA GT-FOUR Rally Car (ST185)
1995 : CELICA GT-FOUR Rally Car (ST205)
1991 : CELICA GT-R (ST183, 4WS)
1997 : CELICA SS-II (ST202)
1999 : CELICA SS-II
1981 : CELICA XX 2800GT
2003 : CELICA (WEDSSPORT JGTC)
2002 : COROLLA RUNX Z AEROTOURER
1998 : COROLLA LEVIN BZ-R
1983 : COROLLA LEVIN GT-APEX (AE86)
1998 : COROLLA Rally Car
1999 : GT-ONE Race Car (TS020)
2002 : ist 1.5S
1986 : MR2 1600 G
1986 : MR2 1600 G-Limited Super Charger
1997 : MR2 G-Limited
1997 : MR2 GT-S
1999 : MR-S S Edition
2002 : MR-S V Edition (6MT)
2000 : MR-S (SUPERAUTOBACS APEX JGTC)
2004 : Motor Triathlon Race Car
2002 : PRIUS G (J)
2003 : PRIUS G Touring Selection (J)
2001 : RSC
2002 : RSC Rally Raid Car
1992 : SERA
1997 : SOARER 2.5GT-T
2001 : SOARER 430SCV
1965 : SPORTS 800
1998 : SPRINTER TRUENO BZ-R
1983 : SPRINTER TRUENO GT-APEX (AE86)
2000 : SPRINTER TRUENO GT-APEX S.SHIGENO VERSION
1997 : Starlet Glanza V
1988 : SUPRA 3.0GT Turbo-A
1990 : SUPRA 2.5GT Twin Turbo-R
1997 : SUPRA RZ
1997 : SUPRA SZ-R
2000 : SUPRA (DENSO SARD JGTC)
2000 : SUPRA (Castrol Tom's JGTC)
2001 : SUPRA (Castrol Tom's JGTC)
2001 : SUPRA (au CERMO JGTC)
2001 : SUPRA (ESSO Ultraflo JGTC)
2003 : SUPRA (WOODONE Tom's JGTC)
2004 : Tacoma X-Runner
1999 : Vitz F
2000 : Vitz U Euro Sport Edition
2002 : Vitz RS Turbo
2000 : VITZ RS 1.5
2002 : VOLTZ S
2001 : WiLL VS
U.S.
BUICK:
1987 : GNX
1962 : Special
CADILLAC:
2002 : Cien
CALLAWAY:
2003 : C12
CHAPARRAL:
1967 : 2D Race Car
1970 : 2J Race Car
CHEVROLET:
1988 : Camaro IROC-Z Concept
2001 : Camaro LM Race Car
1969 : Camaro SS 350
2000 : Camaro SS
1969 : Camaro Z28 302
1997 : Camaro Z28 Coupe
1970 : Chevelle SS 454
1954 : Corvette Convertible (C1)
1996 : Corvette Grand Sport
1963 : Corvette Stingray Coupe (C2)
1969 : Corvette Stingray L46 350 (C3)
1990 : Corvette ZR-1 (C4)
2000 : Corvette Z06 (C5)
2000 : Corvette C5R (C5)
2002 : Silverado SST Concept
2003 : SSR
CHRYSLER:
2004 : Crossfire
2002 : Prowler
2000 : PT-Cruiser
2005 : 300C Hemi
DMC:
2004 : DeLorean S2
DODGE:
1970 : Charger 440 R/T
1971 : Charger Super Bee 426 Hemi
2004 : RAM 1500 LARAMIE Hemi Quad Cab
2003 : SRT4
1999 : VIPER GTS
2000 : VIPER GTS-R (Team Oreca Race Car)
2000 : VIPER GTSR Concept
2003 : VIPER SRT10
EAGLE:
1997 : Talon Esi
FORD:
1998 : Escort Rally Car
1999 : FOCUS Rally Car
2003 : FOCUS ST170
2002 : FOCUS RS
2005 : GT
2002 : GT Concept
2002 : GT LM Edition
2004 : GT LM Edition Spec-II
1969 : GT40 Race Car
2001 : Ka
1915 : Model T Tourer
2005 : Mustang GT
2000 : MUSTANG SVT Cobra-R
1984 : RS200
1985 : RS200 Rally Car
2003 : SVT F-150 Lightning
1998 : Taurus SHO
INFINITI:
2002 : FX45 Concept
2003 : G35 SEDAN
JAY LENO:
1903 : Tank Car
LEXUS :
1998 : IS 200
1998 : IS 200 (J)
2001 : IS 300 Sport Cross
2000 : GS300
2000 : GS300 Vertex Edition (J)
2001 : SC430
MERCURY:
1967 : Cougar XR-7
NIKE:
One 2022
PANOZ:
1998 : Esperante GTR-1 Race Car
PLYMOUTH:
1971 : Cuda 440 Six Pack
1970 : Superbird
PONTIAC:
2004 : GTO 5.7 Coupe
2002 : Solstice Coupe Concept
2002 : Sunfire GXP Concept
1964 : Tempest LeMans GTO
2003 : Vibe GT
SALEEN:
2002 : S7
SHELBY:
1967 : Cobra 427
1965 : Mustang G.T.350R
2003 : Series 1 Super Charged
Europe
AC:
1966 : Cars 427 S/C
ALFA ROMEO:
2002 : 147 2.0 Twinspark
2002 : 147 GTA
1993 : 155 2.5 V6 TI Race Car
1998 : 156 2.5 V6 24V
1998 : 166 2.5 V6 24V
2004 : GT 3.2 V6 24V
2001 : GTV 3.0 V6 24V
1963 : Giulia Sprint Speciale
1965 : Giulia Sprint GTA 1600
1966 : Spider 1600 Duetto
2001 : Spider 3.0i V6 24V
ALPINE:
1973 : A110 1600S
1973 : A310 1600VE
ASTON MARTIN:
2000 : DB7 Vantage Coupe
2003 : DB9 Coupe
1999 : V8 Vantage
2004 : Vanquish
AUDI:
2002 : A2 1.4
2003 : A3 3.2 quattro
2004 : A4 Touring Car (RedBull DTM)
2002 : AUDI Abt Audi TT-R Touring Car '02
2003 : Le Mans quattro
1982 : Audi quattro
2001 : R8 (Infineon LeMans)
2001 : RS 4
2002 : RS 6
2002 : RS 6 Avant
2002 : S3
1998 : S4
2003 : S4
2000 : TT Coupe 1.8T quattro
2003 : TT Coupe 3.2 quattro
AUTOBIANCHI:
1979 : A112 Abarth
BENTLEY:
2003 : Speed 8 Race Car
BMW:
2004 : 120d
2004 : 120i
1973 : 2002 Turbo
2003 : 320i Touring Car
2005 : 330i
1997 : McLaren F1 GTR Race Car (Fina LeMans)
1998 : M Coupe
2004 : M3
2003 : M3 CSL
2003 : M3 GTR
2001 : M3 GTR Race Car
2005 : M5
1999 : V12 LMR Race Car (Dell LeMans)
2003 : Z4
CATERHAM:
2002 : Seven Fire Blade
CITROEN:
1954 : 2CV Type-A
2002 : C3 1.6
2003 : C5 V6 Exclusive
2000 : Xantia 3.0i V6 Exclusive
1999 : Xsara Rally Car
2003 : Xsara VTR
CIZETA:
1994 : V16T
FIAT:
1965 : 500F
1969 : 500L
1972 : 500R
2000 : Barchetta Giovane Due
2000 : Coupe Turbo Plus
1990 : Panda Super i.e.
2000 : Punto HGT Abarth
GILLET:
2004 : Vertigo Race Car
GINETTA:
1964 : G4
HOMMELL:
1999 : Berlinette R/S Coupe
JAGUAR:
1961 : E-Type Coupe
2002 : S-Type R
1992 : XJ220
2001 : XJ220 LM Edition
2002 : XKR R-Performance
JENSEN HEALEY:
1974 : Interceptor MkIII
LANCIA:
1985 : Delta S4 Rally Car
1991 : DELTA HF Integrale Evolutione
1992 : Delta HF Integrale Rally Car
1973 : STRATOS
1977 : STRATOS Rally Car
LAND ROVER:
2004 : Range Stormer Concept
LISTER:
1999 : Storm V12 Race Car
LOTUS:
1990 : Carlton
1962 : Elan S1
2000 : Elise
2003 : Elise 111S
2004 : Elise 111R
1998 : Elise Sport 190
2001 : Elise Type-72
1987 : Esprit Turbo HC
2000 : Esprit Sport 350
2002 : Esprit V8
1998 : Esprit V8 GT
1998 : Esprit V8 SE
1971 : Europa Special
1999 : Motor Sport Elise
MARCOS:
1970 : Mini Marcos GT
MERCEDES-BENZ:
1998 : A160 Avantgarde
1886 : Benz Patent Motor Wagen
1886 : Daimler Motor Carriage
1989 : C9 Race Car (Sauber)
1991 : 190E 2.5 16V Evolution II
1992 : AMG 190E 2.5 16V Evolution II Touring Car (DTM)
1954 : 300 SL Coupe
2000 : CL 600
2000 : CLK 55 AMG
2000 : CLK Touring Car (D2 DTM)
1998 : AMG CLK-GTR Race Car
2002 : E55 AMG
1998 : SL 500
2002 : SL 500 (R230)
1998 : SL 600
2004 : SL 600 (R230)
2002 : SL55 AMG (R230)
2004 : SL65 AMG (R230)
1998 : SLK 230 Kompressor
2003 : SLR McLaren
MG:
1997 : MGF
2003 : TF160
MINI:
1998 : Mini Cooper (allegedly Appears in Used Cars late 90's)
2002 : COOPER
2002 : COOPER-S
2002 : ONE
OPEL:
2000 : Astra Touring Car (Opel Team Phoenix)
1994 : Calibra Touring Car (DTM)
2001 : Corsa Comfort 1.4
2000 : Speedster
2000 : Speedster Turbo
1999 : Tigra 1.6i
2003 : Vectra 3.2 V6
PAGANI:
2000 : Zonda C12
2000 : Zonda C12S
2002 : Zonda C12S 7.3
2001 : Zonda Race Car
PESCAROLO:
2003 : Pescarolo Courage C60/PEUGEOT Race Car
2004 : PlayStation Pescarolo C60 LMP Judd Race Car
PEUGEOT:
2003 : 106 Rallye
2003 : 106 S16
1985 : 205 Turbo 16
1985 : 205 Turbo 16 Rally Car
1986 : 205 Turbo 16 Evolution 2 Rally Car
2001 : 206cc
2003 : 206 RC
1999 : 206 S16
1999 : 206 Rally Car
2004 : 307 XSi
1998 : 406 3.0 V6 Coupe
1992 : 905 Race Car
RENAULT:
2002 : AVANTIME
2002 : Lutecia Renault Sport 2.0 16V
2003 : Lutecia Renault Sport V6 Phase2
2001 : Lutecia Renault Sport V6 24V
2000 : Lutecia Renault Sport V6 24V Race Car
2000 : Megane 2.0 IDE Coupe
2002 : Megane 2.0 16V
1980 : 5 Turbo
1985 : 5 Maxi Turbo Rally Car
RUF:
2000 : 3400S
1986 : BTR
1987 : CTR Yellow Bird
1996 : CTR2
2000 : RGT
SEAT:
2004 : Ibiza Cupra
SPYKER:
2002 : C8 Laviolette
TRIUMPH:
1974 : Spitfire 1500
TVR:
1997 : Cerbera Speed 6
2000 : Cerbera Speed 12
1994 : Griffith 500
2003 : T350C
2002 : Tamora
2000 : Tuscan Speed 6
1991 : V8S
VAUXHALL :
2001 : Corsa Comfort 1.4
2003 : Vectra 3.2 V6
1999 : Tigra 1.6i
2000 : VX220
2000 : VX200 Turbo
1994 : Calibra Super Touring Car
2000 : Astra Super Touring Car
VOLKSWAGEN:
1949 : Beetle 1100 Standard (Type-11)
2001 : Bora V6 4MOTION
1976 : Golf I GTi
2001 : Golf IV GTi
2003 : Golf IV R32
2005 : Golf V GTi
1968 : Karmann Ghia Coupe (Type-1)
2001 : Lupo GTi
2002 : Lupo 1.4
2000 : Lupo Cup Car
2003 : Lupo GTi Cup Car (J)
2000 : New Beetle 2.0
2000 : New Beetle RSi
2000 : New Beetle Cup Car
2001 : Polo GTi
2001 : W12 Nardo Concept
VOLVO:
1988 : 240 GLT Estate
2003 : S60 T-5 Sport
Tuners
AMUSE:
2004 : S2000 Street Version
2004 : S2000 R1
2004 : S2000 GT1
2004 : CarbonR (R34)
BLITZ:
2004 : ER34 D1 spec 2004 (D1GP)
HKS:
2004 : SILVIA RS2 (Genki Hyper D1GP)
HPA Motorsports :
2004 : Stage II R32
MINE'S:
2000 : Lancer Evolution VI
2000 : SKYLINE GT-R N1 V-spec (R34)
OPERA:
2004 : S2000
2004 : Z
RE AMEMIYA:
2004 : AMEMIYA ASPARADRINK RX-7 (JGTC)
SPOON:
2000 : CIVIC Type-R (EK)
2003 : Fit Race Car
1999 : INTEGRA Type-R (DC2)
2000 : S2000
2000 : S2000 Race Car
TOM'S:
2000 : X540 CHASER
TRIAL:
2003 : CELICA SS-II (ZZT231)
[Edited on 05-06-2005 by h18_oab]
|
Skipz
Member
Registered: 23rd Aug 03
Location: Falkirk: Drives:nothing but gettin another Corsa
User status: Offline
|
Using Snap day (vibrios photography guide aswell) and a few other Sources I've came up with this!
This is basically a tutorial on how to take pictures in Gt4's Photo travel, the Setup of the games photgraphy unit is much like a real Camera that your Ordinary keen photographer would use, with settings such as Apperture, Color
Filter, Focus, Focal length, Exposure... If you can work a Decent camera you can work GT4's Photo mode Easily!
EXOTIC LOCATIONS
(US) BEACON HILL
(US) BROOKLYN
(ORIGINAL) FISH MARKET
(JP) GION
(US) GRAND CANYON
(US) LAS VEGAS
(JP) MARUNOUCHI
(JP) NANZENJI
(IT) PIAZZA SAN MARCO
(IT) PONTE DI RIALTO
(JP) SAGANO
(JP) SHIBUYA
(JP) TOGAKUSHI KOGEN
(JP) TIMES SQUARE
(JP) TSUMAGO
Fish Market is the only area that is completely made-up.
CHOOSING YOUR RIDE
In Photo Travel Mode, whichever car you are currently "IN" will be
chosen as the default vehicle for the Photo.
To switch vehicles, you need to go back to your Garage and manually
change cars and then go back to Photo Travel Mode. You have to do this
every time you want to change vehicles.
HOW THE HEADS-UP DISPLAY WORKS
Photo Travel Mode is found only in Gran Turismo Mode. Select GT Mode
and place the cursor on the upper left corner of the HUD (Heads Up Display) to find it.
After choosing a location, you are presented with an onscreen HUD with
the following:
ON SCREEN MAP
On the left-hand side of the screen is the map of the chosen location.
MAP CONTROLS:
X BUTTON: SELECT/DESELECT ICON
CIRCLE BUTTON: BACK TO DEFAULT POSITION
LEFT ANALOG STICK: MOVE ICON
RIGHT ANALOG STICK: ROTATE VEHICLE POSITION (RED ICON ONLY)
RED AND BLUE ICONS:
Notice that the Car is placed as a RED Icon and the Camera as a BLUE
Icon positioned by default on the map.
Move the cursor to the map and press the X BUTTON to select either Icon
and manually move them.
On the map itself are RED and BLUE colored areas. This display shows
where and how far the Camera (BLUE) or the Car (RED) can be moved.
If an EXCLAMATION POINT symbol appears, it means that the Icon CANNOT
be placed there.
POSITIONING THE VEHICLE:
When selecting the Car Icon, rotate the RIGHT ANALOG STICK in any
direction to position the car in front of the frame. The vehicle can be
rotated to any degree for maximum effect.
The Car Icon can only be placed in red-shaded areas of the map.
POSITIONING THE CAMERA:
When selecting the Camera Icon, place the cursor over the Icon and move
the Camera into the blue-shaded areas. From there, place the cursor on
the Camera Screen layout to manually rotate and position the camera
lenses.
NOTE: In some map locations, there are some default Camera positions
(like the Grand Canyon for example).
Test out what area and angle you feel is best for your Car.
ON SCREEN CAMERA FRAME
On the right-hand side of the HUD is the Camera frame. This is where
you determine the position of your Photo and your frame.
CAMERA FRAME:
The default angle is always in front of the car at a 45-degree angle
when starting a new shoot.
Above the Camera frame is a small Lightning Bolt Icon. This Icon is the
VERTICAL/HORIZONTAL option. When you choose this option, the frame can
be manipulated to either be a Horizontal wide shot or a Vertical
cropped shot.
As you move the RED and BLUE Icons, the frame itself is static.
Every time that the vehicle is moved out of the frame, the Camera
itself has to be manually moved with the vehicle also
CAMERA ON SCREEN COMMANDS
These commands are located underneath the Camera Frame. This is where
you can take control of the Photo Shoot.
PAN/TILT CAMERA VIEW:
The first Button indicates Pan/Tilt option. You can move the Camera
angle in a 360-degree motion to get the best angle for the vehicle.
Press and hold the X BUTTON and rotate the LEFT ANALOG STICK to move
the Camera view.
**When you manually move the Car, this option is what you use to swivel
the Camera clockwise or counter-clockwise and find the angle needed.
ROTATE VIEWFINDER VIEW:
This indicates the rotation of the Camera giving the angle a sort of
tilted/sideways feel to the car. By default, the angle is always
straight.
Press the X BUTTON and rotate the LEFT ANALOG STICK to manipulate and
twist the Camera view.
MOVE CAMERA:
With this option, you can move the Camera from left to right (of the
car). You can also move back for wide shots or get in close for an
EXTREME CLOSE-UP!! WHHHOOAA!!!
Press the X BUTTON and use the LEFT ANALOG STICK to move the Camera in
a four-way direction.
POINT OF VIEW CAMERA:
With this option, certain locations can have the Camera go really high
for a Bird's Eye View perspective or down to the ground for a Road's
Eye View.
The Bird's Eye View gives the vehicle a smaller effect. Making the area around the car look large and the car small.
The Road's Eye View gives the vehicle the Muscle Car effect. Shooting
from down low makes the vehicle hulk over the frame making it look
intimidating.
Press the X BUTTON and move the LEFT ANALOG STICK up or down for the
desired effect.
VARIOUS COMMANDS
Underneath the Camera Controls are the various commands that enhance
the Camera Frame and the development of the Photo process.
WHEEL ADJUST
When selecting this option, you can manually adjust the front wheels of
the vehicle to face 30-degrees to the left or 30-degrees to the right
maximum.
ADJUST LENS
From here you can choose from the various settings: Vignetting, Color
Filter, Exposure, and Color Tone.
VIGNETTING:
Vignetting is known as the "halo". When setting the maximum effect for
Vignetting, the Photo is given a dark halo around the edges.
COLOR FILTER MODE:
There are three settings of color for your Photo: Vivid, Mature, and
Monochrome Color.
VIVID color is the Default Color during Photo Travel Mode. This option
brightens the vehicle and the surroundings to look more robust.
MATURE color gives the vehicle and the environment a darker palette and
less colorful palette that makes it blend with the environment for a
more realistic look.
MONOCHROME color is a plain black, white, and gray color palette.
**IMO, Mature is always the best. Your vehicle looks way
better and can fool anyone who sees it.
EXPOSURE:
With this option, you can choose from two different types of exposures.
Do you want the Photo to have a dark, noirish-style element or should
the Photo look like it was taken during a nuclear winter?
Choose one to your liking.
COLOR TONE:
There are three sets of color tones for the Photo: DEFAULT, SEPIA, BLUE
DEFAULT: The color is unchanged
SEPIA: When you move the COLOR TONE meter to the left, the color is
turned to a dark brownish-yellowish tone.
What this does is give the Photo an "old-style and rusty" look. It also
gives the vehicle and surroundings a "Hot and warm" setting
BLUE: When you move the COLOR TONE meter to the right, the color around
the car itself is turned blue, leaving the car as the only source of
color in the photo.
What this does is give the vehicle and surroundings a "Cool and cold"
setting.
PHOTO MODE OPTIONS
From here you can choose the type of Photo session, Shutter sound,
Focus control, and quality of the image when saved on the Memory Card.
ADJUST FOCAL LENGTH
You can choose to use an Amateur style of lenses or a Professional
style.
Not all lenses are adjustable for focal length. Longer lenses flatten perspective which as its not something your eye would normally do generally gives a pleasing image. Many point and shoot would do this, as would changing your lens on SLR if you're using prime.
Generally prime lenses (one single focal length) are sharper than zooms (rotate or push/pull to change focal length), although the zooms are more versitile.
How do the Focal lenses work? Every Professional Camera has a lens
adjust option. When a Photographer snaps a Photo, he rotates the lens
in front of the focal point to get a closer shot from a faraway
distance or vice versa.
APERTURE ADJUST:
This adjusts how fast the Photo itself will be taken (1.4 being the
fastest, 22 being the slowest).
Wider aperture means more light which means faster shutter, which means you freeze the action. Narrower aperture the opposite is true, slower shutter, more motion blur.
That is how you can have to styles of photo on the same day of the same car, one totally frozen and one wheels/background blurred etc. Without the ability to adjust aperture the blurred one would be massively over-exposed because you've let more light in and blown the photo out. Aperture controls this.
Aperture also has an effect on depth of field - the distance around your focus point which is still in focus. Wide aperture means narrow depth of field which means that if you photograph a person 6 foot in front of a wall, the wall is not in focus. This is called bokeh and again, looks professional in a lot of cases.
Narrow aperture means better depth of field, ie. more in focus, which generally doesn't pick the object you're photographing out from the background so well, but which would make sure that the entire object - ie. entire car - is in focus from headlight to tail light as opposed to having sharp windscreen pillars and a blurred grille.
And finally...
SET FOCUS
Click on this button to auto-focus the image.
**BIG NOTE: If the Car is blurred after auto-focus, manually move the
Camera back and re-adjust the lens. Re-focus the lens for a clearer
shot.
TAKE PHOTO:
If i need to Explain this You need to be shot (it's the Silver button with the red dot in the centre It can be found on the Right hand side of the Screen if you REALLY need to know!!!)
VIEWING AND SAVING THE PHOTO
CONTROLS:
R1 BUTTON: ZOOM IN
L1 BUTTON: ZOOM OUT
START BUTTON: SAVE PHOTO TO MEMORY CARD OR USB DEVICE
SQUARE BUTTON: GO BACK TO CAMERA MODE
After taking the Photo, you can save it to the Memory Card or transfer
it to a USB device.
All photos are saved as JPEGS and have the SCEI/Gran Turismo 4
watermark on the bottom right-hand side You can then use the image as Wallpaper on your PC or Desktop.
Thanks to Ian For his input on this aswell
|
Skipz
Member
Registered: 23rd Aug 03
Location: Falkirk: Drives:nothing but gettin another Corsa
User status: Offline
|
Whats the difference between Modified And Un-Modified cars on GT4???
Un-Modified...
BMW M3
Modified..
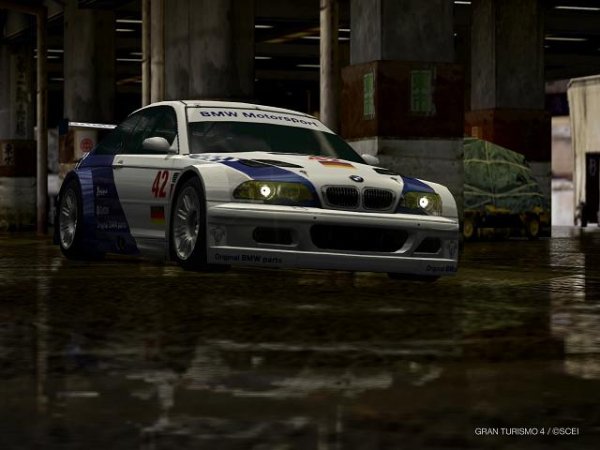
BMW M3 GTR Race car
basically you have two Types of car on Gt4.. Modified and unmodified...
Modified are usually - Race cars, Concept cars, Such as.. Gt40 Race car, M3 GTR Race car (pictured above) Nike 2022 (concept) Cadillac Cien,
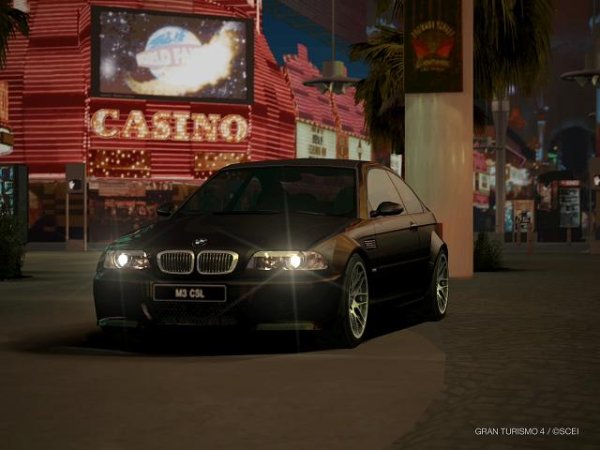
Unmodified - road legal cars such as.. BMW M3 CSL (as pictured above) Ford Focus RS, Ford GT, Mercedes Mclaren SLR
Cars you cant buy from the Manufacturer are normally classed as MODIFIED cars aswell,
If the race you are going to Enter says Unmodified cars only this does NOT mean you cannot go to the manufacturer and buy all the available Parts! this can Still be done to acheive the win, the car is not judge buy its engine modifications but it is judged by wings and spoilers.. i.e race cars
|
Skipz
Member
Registered: 23rd Aug 03
Location: Falkirk: Drives:nothing but gettin another Corsa
User status: Offline
|
Introduction to Driving Missions
The driving mission is new to the GT series, and they are alot
like license exams with other cars on the road with you. Unlike license exams you will not "fail" for going off the track, but, if you bump a wall, or
another vehicle, you will earn a "5 second penalty"
To pass these missions, you will need to finish ahead of all the AI cars
before the finish line. Often times you are given a car with
identical or sometimes inferior handling / acceleration characteristics, so
you will need to be a better driver than the AI to win. In other cases, you
will be given a far superior vehicle, but you will start way behind the lead
car, and must use your skill and the vehicle's performance to catch the leader.
For begginers Missions 1-9 are rather Easy, after that they get a little bit harder. To adjust yourself to these Missions, You are better off Learning the game first, try Beginner hall and working your way through Gran Turismo before you jump into the Harder Missions (10-34) Learn the characteristics of each car, and expect it to be slightly different every time, learn the tracks and memorize them!
The 5-second Penalty:
This new addition to GT4, will probably cause you to fail more than once. If you get a penalty, you will not be able to accelerate faster than 30-31mph for 5 seconds. If you earn a penalty by hitting something at high speed, you will not automatically slow down immediately but gradually slow to the limiter, You can earn a 5-second penalty in the following ways:
1. You bump a wall, barrier, invisible boundary of the course, with the
FRONT HALF (i.e. front bumper, or front sides) of your vehicle with more
than a very slight force.
2. You bump another vehicle with the FRONT HALF of your vehicle with more than a very slight force.
3. Another vehicle bumps YOU, on the FRONT HALF of YOUR vehicle with more than a slight force.
In general, if you hit a barrier, wall, or another vehicle with the rear half
of your car, then often you will find you will not get a penalty. Also, on
some tracks you can "wallride", which basically means to VERY GENTLY bring the side of your car in contact with a wall, and then hold the gas around the turn, letting the wall redirect your vehicle. In a few situations that I will point out, wallriding can be used to a tremendous advantage, and, if you are careful, will not earn you a 5-second penalty.
Missions 1-9
For these missions, all you have to do is this: Note where
the AI brakes for the turn. Brake slightly later than the AI, and turn inside
of the AI car. You want to brake less than the AI, but not so much less that it causes your car to slide. A winning tactic will be to brake late, and steer your car so that the FRONT HALF of your car is ahead of the AI. Once this happens, you can make contact with the AI car without the 5-second penalty.Simply use the AI car to direct your vehicle around the turn, and then hit the gas to the finish. If you hit the gas too late, you may need to push the AI off the course. This is fine, provided the front half of your vehicle does not make contact with the AI car.
Mission 10
This is the first mission where you have more than one car to pass, and
more than one turn in which to pass them. This mission takes place on the long straight of Sarthe Circuit I. There are 3 AI cars ahead of you. Sarthe I is the version with the chicanes, so you'll have to use a combination of drafting and good turning to catch the AI.
The key to this mission is to use the R2 button (if you are driving an
automatic). The auto-shifted car shifts too early in my opinion, and you can
get quite an acceleration boost by running the car up into the redline.
You should hold each gear until:
3rd - 74mph
4th - 91mph
5th - 115mph
Using R2 and simply drafting the vehicles in front of you will probably
be enough to pass the AI in this mission. However, if you want to take the
turns well, then use the following strategy. For the first chicane, brake at
the 100m sign, and slow to 65mph for the R turn. After cutting over the
curbing, slow to 57mph, and coast through the second part of the turn,
getting on the gas when you are clear. For the second chicane, brake AFTER the 100m sign, slow to 80mph and then 55mph. For the final turn, you should be ahead of the first place AI, but if you are not, just take an inside line and you should be ok. If you are REALLY far behind, just punt the leader into the sand by ramming into his vehicle at full speed. This will net you a 5 second penalty, but the AI will be so messed up you'll still be able to win.
3 Lap Battles
For missions 11-20, you will start in last place, and will have 5 AI cars
to pass. You will start near the starting line of the track given, and the AI
cars will start ahead of you. Once you have control of the vehicle, you have
3 laps to pass all of the AI cars. Because you have three laps, you need to
be consistent to catch all the cars. Contrary to what you may think, you
dont need three perfect laps -- in fact, for most of the missions three
average laps will suffice to catch all of the AI cars. The key to passing
these missions is try not to get any 5 second penalties, and more importantly, dont quit if you have a bad lap. One not-so-great lap out of three wont doom you to failure -- keep racing!
Mission 11
For this mission you'll be piloting an old toyota sports car. Lots of
people like to bash this car, because of its "poor" handling, The key to driving this car is to maintain as much speed as you can, and try not to slide sideways by entering a corner with too much speed.
You'll be driving around New York, a course that consists almost
exclusively of 90deg turns. This is nice, because each turn is basically the
same as all the rest, so once you find the right speed through each turn,
you're all set. I found that if you slow to 39-44mph before each of the 90deg turns, you wont slide and will have good exit speed. You may need to slow more than this for a series of turns in a row. In general, USE THE GEAR INDICATOR! I found that the light flashes at just the right time to start braking (maybe a little early). When the light flashes -- start braking! For the long circle 45mph is a good speed to have going around. For the final, tight hairpin, slow to about 33mph -- try to exit in a straight line with full gas.
Also, if you are using an automatic transmission, make use of the R2
button. Holding a gear into the redline will get you a little bit more
acceleration, and if done consistently throughout the 3 laps, will save you
a nice chunk of time. You should pass the lead AI car soon after the hairpin
on the final lap.
Mission 12
For this test, you'll be piloting a LeMans version of the Ford GT on the famous Laguna Seca Raceway. This car is super fast, has strong brakes, and handles very well.
When piloting the GT, brake fairly late -- just before you actually
take the turn. Most of the turns require brief braking, followed by a strong
application of throttle. For the first turn, slow to about 60mph, and apply
just enough throttle to keep your speed, without going off course. The rest
of the corners leading to the corkscrew are fairly easy -- brake late, gas on
at the apex, and dont drive into the grass. For the corkscrew, you can
either choose to brake and drive through it properly, or brake and drive
through the sand. If you choose the latter, do it carefully, or you'll earn
a 5-second penalty when your car spins out of control.
When I completed this mission, I found that the 5th place and 3rd place
cars are spaced just right so that if you aren't posting blistering lap times,
you'll have to pass them on the corkscrew. This is undesirable, because
you'll waste a lot of time trying to get around them at a section of the track
where there is no room to pass -- consider using the sand if this is the case. Also, the 4th place car appears right at the final tight left hand corner. 50mph is a good speed normally through this corner, but you may have to slow more than this, and pass 4th place on the straight. Slow more than you have to, and take an inside line to pass 4th place quickly.
Mission 13
This test takes place at Opera Paris -- a tight track with narrow lanes.
It's difficult to pass cars on this track because of the close quarters, so
be especially wary of the 5-second penalty!
Your car handles pretty well in this test, so again you'll be braking
fairly late for the corners. The first section of this track is the hardest
to do quickly. I suggest you attempt license tests IA-9 and S-11 before
you do this mission, so you have a good idea how to tackle this course.
For the back straight, there is a slight left hand kink in the road.
To take this turn quickly, brake to around 105mph, COAST through the turn, and apply the gas once you know you wont hit the walls on the other side. The AI brakes way too early for the hard right at the end of the straight, so you'll probably pass several of the AI cars by going to the inside, and braking late.
Mission 14
A lot of people have problems with this mission, and for good reason.
First, the lead car is a Buick Special, and it has a much better top speed than you, so dont expect to catch it on the straights. Second, you are driving a muscle car, which basically means it's good at driving in a straight line, but sucks at taking turns. Read the information about this mission to help you learn to drive the superbird. You need to brake VERY early for the turns, and be careful not to get on the gas too quickly, or you'll get tons of oversteer. Thankfully, the gear indicator is pretty good for this test, so when it flashes, start braking! Also, if you are getting oversteer during a turn, turn the steering wheel in the opposite direction (with the gas ON), to straighten the car out.
For the first turn, brake as soon as the gear indicator flashes. Slow to
34mph, and steer around the turn with little to no throttle. When you can
clear the apex, hit the gas, using the countersteer technique just described
to keep the car going in a straight line. For the jumping section, there are
three hills to cross, and then a hard right. You need to brake right as you
crest the short, flat section right after the third jump. You'll find the
brakes are even less effective than usual, because your traction is low when cresting a hill -- be aware of this. For the back straight, use the gear
indicator as a marker (before the 100m sign), and slow to 50mph. Use minimal throttle to go around the turn and into the last section. For the very last chicane, your exit speed is CRUCIAL to winning this mission. You MUST avoid sideslip, and you need to have as much speed as you can, because the Buick Special is going to run away (or catch you, if you're ahead!) from you on the front straight.
Mission 15
For this test, you'll be piloting a Lancia Stratos around Cote d Azur -- a
very tight street track with narrow roads. That being said, the performance
of the Lancia is much better than the AI cars, so this test is a breeze. Be
careful with the Lancia though, as it tends to freak out if you have too much
speed in a corner -- brake early and more than you think.
For the first turn, slow to 48mph or so, and you should be able to make it fine. At the top of the course, there is a long left hand sweeper and with a hard right immediately following. You can wallride around the sweeper and make up lots of time -- be careful doing this though, because it's easy to get a penalty trying to turn right after the wallride. If you choose to wallride, brake in a straight line once you have finished the wallride, then start driving again. For the back straight, there is a very tight chicane that
requires a lot of braking. I found that the gear indicator flashes way too
late to take this turn properly. Start braking when you pass the columns that stick out from the right of the course. Slow to 33mph or so, and you should be able to navigate the chicane easily.
Mission 16
For this test, you and the AI will be driving identical VW Beetle race
cars. Because all the cars are identical, you cant win by outpowering them on the straights -- victory will be won in the turns. Having said that, you CAN gain an advantage on the AI by holding R2 if you are using an automatic transmission.
Suzuka is a tough circuit to drive quickly, so if you dont have a good
idea of what lines to take, you probably wont be able to catch the AI cars.
License test S-12 features this track, so try that first if you aren't
familiar with the layout.
For the esses after the first corner, the best approach is to lift off the
throttle, and coast through the apex, applying the gas once you are through the turn. You need to use as many of the curbs as possible, because the esses is where you will make up most of your time on this track. Keep your speed high through here, and you'll start catching the opponents. For the back straight there is a left turn called 130R that leads to the final chicane. You can take 130R at full speed, just be aware that you will cut across the grass. In a license test this would cause you to fail, but its ok in the driving mission. Be sure to cut back onto the main road once you have the traction to do so. For the final chicane (Casio triangle) brake just before the Konami bridge this will feel very late, but your brakes are powerful so be brave! Navigate your way through the chicane, and then get ready to do it all over.
Mission 17
This is a pretty easy mission. You will be driving an Audi R8 race car
around Sears Point. The performance of the R8 is excellent in all respects,
so it will probably take you a couple of tries to find it's limits in terms of
cornering, acceleration, etc. If you want to practice, you can try the S-13
license test -- same course and car. My only tips for the course are: watch
the S-13 license demo to find the right line through the top section; for the
last of the esses leading to the final hairpin, slow to 140mph, and then you
should be able to navigate the last turn under full throttle.
Mission 18
If you haven't done IA-16 and S-15 license tests yet, or you haven't done an endurance race around the Sarthe Circuit, then you are going to struggle with this mission. Your car is the super-fast R92CP, and keeping this bad boy under Control is no small task. If you simply cant be bothered to try the S-15 license, at least watch the demo to find what the racing lines are. This test uses the easier Sarthe II layout, without the chicanes on the Mulsanne straight so you don't have to worry about those. You need to be fast and consistent to pass this mission, so it's probably going to take several attempts. Sartheis a very narrow track, so your driving lines MUST be precise, and your entry and exit speeds spot on, or you are going to lose a ton of time or fly right off the course.
There are two pieces of advice that I can offer when working on this test. First, you need to be fast through the infield section leading to the long straight on the first lap. If you can't catch the 5th place AI car before the very sharp right at the end of the Mulsanne, then you are probably going to lose too much time following, or get a 5 second penalty trying to pass. To do this, you need to hit the first split on the Mulsanne (2nd split overall) at +30.5s or so. It goes without saying that you should use the draft of the AI vehicles whenever possible -- just dont ram their rear end. Second, there are three sets of chicanes on this course -- one left-right near the starting line, and a pair back-to-back at the end of the course. The fastest line to take through these is of course a straight line -- dont try to follow the contour of the curbs, cut right through. If you are unlucky, an AI vehicle will appear right in your way, so if that's the case, cut through the sand to get around them. Some have suggested that for the final two chicanes, you can cut straight through the sand. This is a risky tactic, but it could save you a bunch of time. If you choose to sand-cut, then be sure that you do NOT make ANY steering inputs until all 4 of your tires are back on the pavement. If you turn/brake/accelerate with less than 4 tires on the pavement you'll spin out. Nevertheless, driving as straight a line as
possible on the pavement through the chicanes will earn you a lot of time.
Mission 19
For this mission, you and the AI will be piloting identical (though
differently colored) S2000's. Like other missions with identical vehicles,
you can't win with top speed -- you have to out-turn your opponents to win. That said, this mission is really easy. If you were able to pass the Beetle mission, then this race will be cake. This time, you are racing around Suzuka east, which only has the esses and a single straight. Since the cars are all the same, you will only make up time in the esses.
For the first corner, which is a two part corner, brake to 85mph for the
first turn, and then 58mph for the second. The next section consists of the
esses, which you've seen before by now. Try to go through the esses at about 72-74mph. Before each turn, tap the brake slightly or lift off the throttle. Be careful lifting off the throttle mid-turn, though, because this S2000 (and all of them in the game apparently) possess a handling characteristic called lift-throttle oversteer. Basically what this means is if you are taking a turn with the gas on, and you let off the throttle, your rear end is going to swing wide. This is great for navigating sharp turns, but it doesn't help as much when taking gradual bends. Use the curbing as much as possible to keep your car on the proper line. You can actually pass all of the AI cars in the esses on the 2nd lap,
Mission 20
For this test, you'll be driving the Nissan mm-R car. This car has a
lower top speed than the lead car, an NSX, so you'll have to make up time by out-turning your opponents. Like the description says, this car has excellent brakes, so you'll catch your opponents by braking much later and for a much shorter time than they do. Tsukuba has 3 hairpin turns and a long sweeper right before the finish line. For each of the hairpins, brake LATER than the gear indicator (quite a bit later actually), and slow to ~38mph. Hit the gas after crossing the apex, and keep your speed high through the rest of the turns. For the final sweeper, brake to 73-75mph, and dont hit the gas too early, or you'll go into the grass right before the finish line. This mission is fairly easy.
Slipstream Battles
For each of these battles, you and the AI will be driving identical cars
around Test Course. The goal here is to use aerodynamics to your advantage to catch and pass the lead vehicle, which is usually a good distance ahead. To do this, you need to "draft" the other vehicles. Drafting works to reduce the aerodynamic drag on your vehicle. With decreased wind resistance, your engine can push the car slightly faster, or you can accelerate to your top speed more quickly. The effects of a car's draft last for several car lengths behind it, so you dont have to be right on a car's bumper to draft it. So, for each of these missions, using the AI car's draft is the only way to catch them.
Tips for drafting:
1. For missions 21, 22, and 24, keep the right 2 tires on the outer yellow
line of the straight portions of the track. This will ensure that you
pick up the AI's draft as soon as possible, which will help you catch
the cars as quickly as possible.
2. Stay in the draft as long as you can. If it helps, switch views so that
you can see your front bumper and the AI car's bumper. Pull out of the
draft at the last possible moment, but don't do so abruptly -- sudden
vehicle movements increase wind resistance, or can cause you to slide.
3. On the corners, stay higher up on the track than the AI. When turning,
the draft of the AI is still there, but it is in a line diagonal to the
track. By driving a line higher than the AI, you can pick up an AI car's
draft around a turn, which is better than waiting to do it on a straight.
This also means you should pass AI cars to the outside on the Bends
Mission 21
For this test, you'll be driving a Nissan Cube. These cars are really
slow, so your acceleration is pretty bad. If you follow the general advice
above, you should have no problem with this test. If you are using an
automatic transmission, be sure to NOT let the car switch into 4th gear until
you are well into the 5th place car's draft (you should pick it up around the
turn leading onto the back straight). Once in the draft, you can switch to
4th and continue to accelerate. You only have 1 lap to pass all the cars.
Mission 22
This test is identical to mission 21, except now you are driving a
minivan instead of a Nissan Cube. The minivan is marginally faster than the
Cube, but other than that, employ exactly the same tactics that you used in
Mission 21. In particular, pass the AI cars to the outside, so you can pick
up the next car's draft when rounding the turns. Also, stay out of 5th gear
for the entire race -- if you switch to 5th, you wont be able to hold the
speed that you gained from drafting as long as if you are in 4th. Again,
this is a 1 lap race.
Mission 23
For whatever reason, Polyphony Digital decided to make this test much more challenging than the rest. First, the AI cars aren't equally spaced. The lead car is way, way ahead, and the 2nd-5th place cars are all in a pack. To catch the lead car, you need to take a "leapfrog" approach draft the AI cars, speed up and pass them, have the AI cars then draft and pass you, and then repeat the cycle. If you dont draft the AI, eventually you'll slow down to 163mph, which is the speed of the lead car, and you wont make up any ground. The catch is, the AI wont draft you unless you force it to. Finally, if any AI car is going faster than 163mph when it starts to turn around the long sweepers, it will hit the brakes (!) and slow to 163mph. So, you will need to do some serious manipulation of the
AI cars to win this challenge. You have 3 laps to catch the lead car.
If you've read the threads on the message boards about this mission, there
are lots of different strategies. Some people say you need to stay in 5th gear
the entire time, others say you should always have the AI bump you in the rear
instead of draft them, etc. Here's my strategy, and I can beat this mission
10 out of 10 tries using it. So, for what its worth, here we go.
1. It doesn't matter whether you stay in 5th gear the whole mission or not. I've beaten the mission allowing the car to shift into 6th when it wants, as well as keeping it in 5th the entire time. My suggestion is let it shift when it wants. That's one less button to press for 10 minutes, and one less thing to worry about.
2. There are two ways to increase your speed over 163mph. First, you can draft an AI vehicle ahead of you. Second, you can let an AI car draft you, and when it is about to pass you (almost always to the inside, by the way), you cut it off, and the AI will ram your rear end, giving you a speed
boost.
3. The preferred method of increasing speed is by drafting. You can get to
higher speeds by drafting, and the total time you spend over 163mph is
longer than if you get bumped in the rear. The exception to this rule is
that if the AI car passes you right before a turn, it will slow down, and
not give you any time to draft it.
4. Based on 3., you need to make a decision on the straights. You can
either a) let the AI pass you when they draft, pull in behind the AI, and
draft it, or b) block the AI and take a bump to increase speed. My rule of
thumb is this. If you are more than 2/3 the way down the straight, take
the bump. Otherwise, let the AI draft and pass you. You'll probably find
that sometimes the AI will bump you even if you dont move. To prevent
this, use your rearview mirror, and MOVE OUT OF THE WAY if you have to.
5. Never let off the gas at any point during the entire race. Never.
So here's what you do. For the very first straight and the first turn,
you'll be behind all the AI cars. You'll start to catch them around the first
turn, where they should be in a big pack. Draft them as much as possible, and pass to the INSIDE of all the cars (yes the inside). Preferrably, you can get going as fast as 174-176mph on this first draft. Once you are past all the AI cars, let your car float up so that the right 2 tires are on the yellow line closest to the wall. Use as little steering as you can to make the turn, and then make sure your right 2 tires stay on the yellow line onto the straight. Because you were going so fast on this first turn, the AI will be pretty far behind on the back straight. Use your rearview mirror to make sure that your car and one of the AI's is in a straight line. Your first time down the back straight, the AI may not even get close enough to bump you. This is ok! As long as the AI cars are close to you around the turn, you're fine. For the second time down the front straight, the AI will likely be close behind, so let them pass, and then draft them. Always check your rearview mirror when you pass, and MAKE SURE one of the AI cars is always right behind you. This will help prevent a situation where you get so far ahead the AI can't keep up. For the rest of the straights, use the 2/3 rule. Use minimal steering inputs to negogiate the turns. Using this strategy, I can usually catch the lead car On the back straight of the 3rd lap. If you can see the lead AI rounding a turn, move up on the track to help catch it's draft. You'll be able to get going really fast by drafting the lead AI (180mph or even faster), so once you pass the AI, you are all set. Be sure not to let the AI draft you once you are in 1st place.
Mission 24
For this mission you'll be driving a racing S2000 with a wing. Because
of the wing, the draft effect is very drastic. I found that for this mission
the quieting effect that you hear when you enter another car's draft is not
as drastic as usual. That's ok though, because you'll be able to tell
immediately when you have picked up a draft -- your car will accelerate
quickly. Again, if you are passing AI cars during the turns, go outside,
and stay high on the course to pick up the next car's draft. Finally, the
AI seems to like to draft you on this course, so don't let them draft you
once you are in first place!
1 Lap Magic
These tests are somewhat similar to the 3 Lap Battles, except instead of
placing the AI ahead of you at the start, you have to sit and wait a
predetermined amount of time, and watch the AI cars take off ahead of you. The wait times are up to 2 minutes, so this can quickly get annoying when you want to stop and restart. I dont know why Polyphony Digital chose to do it this way, but whoever was in charge should have been fired. Also, from the title, you now have one lap instead of three to catch all the cars.So, unlike the 3 Lap Battles, which required 3 decent laps, now you need one really good lap to win. A few of these are gimmies, but for the most part you need to be fast, with a capital 'F'. Mission 34 is far and away the hardest of any of the driving missions. Its also the hardest thing to do in the entire game, and may be the hardest challenge ever presented in a Gran Turismo game.
Mission 25
For this mission, you'll need to complete one lap around Fuji 80's in
a Pitwork Z (JGTC car). You start 35s behind the lead car. This test is
really easy, as there are only 3 turns in the entire lap that require braking.
For the first hairpin, slow to 64mph, and then hit the gas once you can clear
the 2nd apex. Dont slow at all for the slight left leading to the long
right sweeper. For this sweeper, slow to 105-110mph, and coast until the
course straightens out, and then apply gas. For the 4th turn (left hairpin),
slow to 58mph, and then use the throttle to steer you out. From there, just
hold the gas on the entire time, and dont ram any cars, as you'll be passing
them at a significantly higher speed.
Mission 26
In this mission, you'll be driving an NSX around Suzuka. This mission
has the second longest wait time (90s) of any of them, which can get you
frustrated in a hurry, so try to stay patient. Because the AI cars are so
much slower than you, they'll be way ahead -- which is good, because you dont have to worry about passing any of them until the last 1/3 of the course. This can be a problem, though, because the AI cars will appear almost stationary when you blast by in your race car -- so stay away from them!
The first corner is a two-part, decreasing radius turn. The first part
of this corner requires no braking -- go right for the apex at full throttle.
Once you've passed the apex, brake in a straight line to ~65mph, and then
turn through the second part of the corner. For the esses, try to go through them at 95-100mph, and keep up your speed, because you make up a lot of time here. For Degner, brake to ~100mph, and turn right at the 50m marker. For the second half of Degner, slow to 67mph, and drive over the curbing to get good acceleration out of the turn. For the sharp hairpin after Degner, slow to 35mph, and hit the gas once you can clear the turn. For Spoon, follow the black tire marks that are on the track -- you'll need to brake a fair amount for the first turn, but not much for the second -- coast here instead of braking. The final turns are 130R and the Casio triangle. If you aren't super fast through the first 2/3 of the course, then you will find that the 3rd place AI vehicle will be sitting in the middle of 130R, which makes it almost impossible to pass. Your 2 options are: 1) Go to the outside, and I mean WAY outside of the vehicle at high speed, which risks a 5 second penalty because you'll hit the outer wall 2) slow down enough so that you pass the AI to the inside. Neither of these options is a great one, so my suggestion is really work hard on the first part of the course to get a fast split. If you dont get to the split right after Degner at +52.0s or less, then you'll probably have a problem with the 3rd place AI. If you can beat +52.0s, then you'll be able to pass 3rd place on the straight, JUST before 130R, which makes life A LOT easier. For the final chicane (Casio), use the gear indicator to start braking. Cut across the curbs as much as you can, and mash that gas so you can catch the last two cars -- go to the inside of them or you'll be in the grass.
Mission 27
This time you'll be driving the great 787B around Laguna Seca. You've
probably seen this track before, if you've already done Mission 12, so now
you'll be driving an even faster car, and the AI will be slower -- which makes
passing dangerous. You start 50s behind the lead car.
I found that the 787B understeers a good bit once the gas is on, so you
will probably have to tap the gas around the corners to avoid going off into
the grass. Dont go to full throttle until you are quite sure you'll make the
turn. You'll want to pass the RX7 (5th place) BEFORE the HMMMM bridge, or it will slow you down on the short straight leading up to the corkscrew.
Also, the 3rd and 2nd place AI vehicles are very close to each other, and
when I went through, I had to pass them on the final hard left turn. If this
happens to you, brake a ton, and pass to the inside of both of them.
Here's a list of suggested speeds through some of the corners:
1st turn - slow to 50mph, and drive deep into the first turn, then cut
sharply around the 2nd turn -- wait to apply the gas or you'll
go into the sand.
2nd turn - slow to ~75mph, then hit the gas (again wait just a bit)
3rd turn - 90mph
4th turn - 73mph
Corkscrew - brake just before the curbing on the right side of the course
appears, go through the 'screw at about 45mph or so
Turn after the corkscrew - slow to about 90mph, gas on once your are going in a straight line
Mission 28
In this mission, you'll be driving a JGTC Celica around a newer Fuji
track. This test is only slightly harder than Mission 25, because there are
a few more corners that require braking. If you've made it this far, then
you have a pretty good idea how to drive a race car. You start 37s behind.
For some reason, there aren't any splits during this race, so I'll provide
some times where I got to certain parts of the course to help you out.
Overall, this test is pretty easy, so you shouldn't have many problems.
Just watch out for the turns leading onto the final straight -- they are
exceptionally sharp, and basically impossible to see before you are right on
them, so take it slow.
Mission 29
For this mission, you'll drive a Corvette C5R around Sears Point. This car isn't as fast as the Audi you drove in Mission 17, so in some respects this test will be easier, because you won't reach the insane speeds you did in the audi. Hopefully by now you've got a good idea of what to expect from Sears Point --the first part is tricky because of the elevation changes, the last part is pretty easy provided you dont go into the grass in the esses. The only AIcar that is difficult to pass is the 3rd place car. The best way to do it is just go inside of it -- this will take you into the grass, but dont worry about it, its faster than trying to overtake the car to the outside.
Some suggested speeds for various turns:
1st Left-Right combo: 125mph up the hill, then slow to 60mph for the 2nd turn
2nd Left-Right combo: 90mph through the first, then slow to 80mph for the 2nd
Hairpin after ^: slow to 55mph, gas on at the apex
Sweeper after ^: 80mph or so, stay to the inside as much as you can, hit the gas when you see the curbing on the left
Hairpin after ^: 40mph
Last Hairpin: 48mph
Mission 30
For this mission, you'll be driving a WRX STi Rally car around Tsukuba.
This is a short track, and you are 53s behind, so you have a lot of ground to
make up, and not much time to do it. Fortunately though, it is pretty easy to drive fast around Tsukuba. There are 3 hairpin turns to negogiate, and all the rest are pretty easy. The gear indicator flashes too early for all of
the turns in this mission, so ignore it. Your brakes are very powerful, and
you never get going all that fast, so brake REALLY late, right before you
actually make the turn.
Suggested speeds for the hairpins (in order):
1st - 43mph 2nd - 40mph 3rd - 38mph
For the final sweeper, brake to 78-80mph, and hug the inside line. The apex is really late for this turn, so gently tap the gas to maintain speed until you can go full throttle. Dont go to far to the outside, or you'll bump the lead AI car right before the finish.
Mission 31
This mission is pretty annoying. Unlike the previous tests, where you
have a nice car to drive, the Lotus Espirit featured here has lousy handling.
You'll be doing one lap around the high speed ring, so you'll need to make the turns keeping your speed as high as possible to win. You have 18s to make up.
For the first turn, use the gear indicator as a brake point and slow to
about 90mph. Tap the gas to maintain speed until you have cleared the turn, THEN go to full throttle. You should pass the elise in 5th just before an S-turn. For the first turn in the S, slow to 70mph or so, again staying OFF the gas until you have cleared the turn. For the second part, slow to 65mph. Keep in mind there wont be much of a straight, so you wont be applying much gas through the S turn. For the right hand turn at the bottom left of the graphic on the screen, slow to 90mph or so -- use as much of the track width as you can to keep your speed high. For the final turn, no braking is required -- you may need to let off the gas to make the turn, but you need to have your speed as high as possible in order to catch 1st place before the finish -- again use all of the track width. Finally, draft the 2nd place and 1st place cars to get a little extra speed, trust me you'll need all you can get to win this one.
Mission 32
For this test, you'll be driving the Ford GT around Seattle reverse.
This mission is really easy -- I got a 5 second penalty right after the
jumping section, and I still beat the SHO to the finish by a second. The
only problem I forsee anyone having is learning to drive the Ford GT
appropriately. The Ford GT has a good amount of lift-throttle oversteer (L.T.O), which has been explained Earlier. Seattle is an excellent place to take advantage of L.T.O., as most of the turns are very tight. The key to using the GT effectively is realize that you cannot trailbrake in this car and
go fast. You MUST do all the braking BEFORE you start your turn -- this way
you can tap the gas in mid turn, take advantage of L.T.O. to round the
corners quickly and get on the gas.
Mission 33
In case you haven't gotten totaly sick of driving around Sears Point,
here's one last chance in the driving mission arena. This time, you'll be
driving the Cadillac Cien. The Cien has lots and lots of horsepower, but
I think the brakes leave a lot to be desired. Hence, you need to brake
much earlier for this test than you have in the past. That said, the gear
indicator is pretty decent in this test. You start 21s behind, and its
not difficult at all to catch the lead AI. The 4th place and 2nd place
AI vehicles are a little annoying to pass -- 4th place appears right at
the hairpin at the top of the course, and 2nd place will present the same
problem that you had in the corvette challenge. Use the same strategy to
pass the 2nd place car -- go inside over the grass. For 4th place, go to
the inside, which will require you to slow down a lot. Again, this mission
is pretty easy, and the splits below aren't that great, so you shouldn't
have much problem.
Mission 34
The SLR
The SLR you'll be driving in this mission has a ton of horsepower, so it
is capable of very fast speeds. However, it also weighs a lot for being a
sports car, so you'll have to fight all that inertia through the corners.
Another problem here is that the combination of high speed which does result in a tendancy for the SLR to lose contact with the pavement. This is really bad, because if you land and make even a SLIGHT steering adjustment, more than likely you will fly wildly out of control. Sometimes you dont even have to make steering adjustments -- the car will land and just become uncontrolable. This is a result of the texture of the road surface been rather uneven. So, how do we control this beast you ask? The key to keeping the SLR on the pavement is timely use of the airbrake. If you drive the SLR, you'll notice that any time you hit the brakes, a spoiler will pop up from the bootlid area. The purpose of the spoiler is to provide extra downforce to help slow the car down. If you want to pass mission 34, there are a few sections where this will be essential to staying on the pavement.
Also, because the SLR has so much power, and you're only given sport
medium tires to work with, the car will understeer if you try and turn a
corner with full or even partial throttle. To avoid this, your strategy
should be to trailbrake through the corners, and hit the gas once you are
clear of the apex. Trailbraking is tricky though, because if you dont brake
enough before the turn, then you're simply going to go off course -- finding
the right brake points is the key to driving fast around the ring. The
exception to the trailbraking rule is if you encounter a multiple corner (i.e
more than one corner in a row without any straight in between). If you
attempt to trailbrake for multiple corners (like S turns or the technical
section after the banked pavement), you'll find you wont be on a good line
for all the corners after the first one. For multiple corners, you need
to brake before the corners, and then use the throttle judiciously to get
through.
A final piece of advice regarding the transmission. The stock tranny on
the SLR is geared extremely wide. There are 6 gears I think, and my bet is
you'll never see 5th or 6th at any point on the ring. Because of the wide
gearing, you need to make every gear count. If you drive an auto, make sure to use the R2 button to hold each gear for maximum acceleration. For 2nd gear, hold R2 until 97mph (a little more or less depending on whether you are going up or down hill). For 3rd, hold it until you hit 149mph. After the first turn, I was in either 2nd or 3rd for about 90% of the course. Holding R2 consistently will save you a lot of time.
Preparing for Mission 34
Perhaps the most annoying feature of this mission is that you have to
sit and wait for 123 seconds before you can even take a shot at this mission. When you are just starting out, and you screw up on the first few turns, this is really annoying when you want to start over and try again. Because of this, I recommend that you practice elsewhere before you attempt this mission.
Here's what you need.
1. You need a car that matches the one that you'll be driving in M34.
Fortunately, all you need to do is buy a stock SLR from the Mercedes
dealer, and you'll be all set. Leave the driving aids on default, and you
should have a decent replica of what you can expect from M34. When I
practiced for this mission, I found that the SLR in the mission is a bit
floatier than the stock one you buy -- so maybe the suspension is a
little softer? I wouldn't mess with it though. If you haven't practiced
much, even the stock SLR will present a challenge for you around the practice course.
2. The second thing you need is a target lap time. Obviously, you dont want to recreate the conditions you'll see in Mission 34, because then you'll
be waiting for 2 minutes every lap. Practice laps give you a running
start, and in mission 34, you start from a standstill -- so what do you
do?
Here's the deal. The lead AI in mission 34 finishes in approximately
9'13.0. The range of times will be a few tenths above or below this time.
You start 123 seconds behind the SLR, so that brings the lap down to
7'10.0. However, the lead AI starts in first place, and you are in sixth
on the starting line. From a standstill, it takes about 3.5s or so to
reach the starting line. So figure on aiming for, AT MINIMUM, a lap of
7'06.5 in practice. Until you can get a laptime within a second or so of
this time, dont bother with mission 34. Either run the 4hr 'Ring
endurance race, or practice on the practice track until you can get this
time. Be careful in practice though, because you wont be penalized for hitting walls -- try to run as clean a lap as you can! Once you can hit 7'06 or so reasonably consistently, you are ready to have a shot at the mission.
Sector by sector analysis
Ok, so you've practiced to the point where you can get a 7'06.5 with a
reasonable amount of consistency. The focus of this section is to help you
to shave off those last few seconds from your time so you can pass the SL and be done with this mission. Please keep in mind that the speeds / strategy posted here is the result of MY run when I finished -- it is by no means the best or 'official' way. It's simply what worked for me. What works for me may not work for you, but I'm writing the FAQ, so maybe you should at least consider my advice.
Start -> T1
This is a fairly easy section to learn and become consistently fast at. There
are a pair of complex corners, but neither of them is really all that tough.
Here's the breakdown.
1st L - You'll be able to accelerate from your 6th place position to a decent
speed, so you'll need to slow to about 50mph to round this corner. As I've
said above, trailbrake here.
2nd R - You can take this turn much faster than you think -- check out S-16
for the right idea. The SLR needs only the BRIEFEST of a tap on the brakes,
and if you turn in very early, you can round this corner at high speed. Try
to not slow down more than 107-108mph, and you'll be doing well.
LR Combo - The left turn in this section isn't much of a left, basically all
it does is prevent you from braking in a straight line. With that, focus your
braking on being able to make the R turn without crashing into the wall. If
you slow to about 62mph or so and hug the inside line, you can hit the gas
early and leave with good exit speed.
LRL Combo - These corners require slight braking. None is required for the
initial left. You should tap the brakes to slow to ~84mph, throttle on for
a brief moment, and then brake slightly longer to 70mph for the final L. If
you do this properly, your momentum will carry you to the outer curbing, but not onto the grass.
Banked R - This turn is a little tricky, because the road dips away from the
curbing. The optimum line is to allow your car to dip slightly with the road,
and NOT over the curbing. Finding the right time to brake here is tough --
practice a few different spots to get it right. The fastest I was able to get
through was at 62mph or so.
L after ^ - This turn shouldn't require any braking. From here, just hit the
gas hard, and dont forget to use R2 when changing gears.
T1 -> T2
There are only 3 real corners in this section, but you can lose a surprising
amount of time on them. This section is also very high speed -- so you will
have to worry about the SLR flying up off the pavement -- use the airbrake
to control this.
Hard R - This turn will appear right after you crest a small hill after getting your T1 split. IMMEDIATELY after cresting the hill, slow to 115mph or so (this will be a short hold of the brake), and start your turn. Depending on how quickly you can start your turn, you will probably have to coast a little before applying throttle or you'll go off in the grass. You dont want that to happen, because you can't accelerate very well on grass. This turn is difficult.
Hard L - This is the hard left turn after the reasonably long 'straight'.
Again, you will crest a hill, causing a loss of contact with the pavement
almost immediately before you need to make steering / braking inputs. I did NOT use the airbrake here -- you dont want to lose any speed, and the car will remain stable provided you dont make any changes until you land. For this turn, I made good use of the gear indicator -- hit the brakes when it flashes, and AS SOON as it stops, turn hard for the left-side curbing and
hit the gas. If you do this correctly, you'll slow from 180mph to 140mph,
and round the turn at full throttle.
Hard R - There is a large sand area on the far side of this turn, to save
you if you overshoot. There isnt much time between when you finish the turn above and when you need to start braking. If you look closely at the pavement there is some graphiti written in red. This is an excellent point to hit the brakes. Slow to 60mph or so. This is a fairly long braking period. Towards the end of the braking, tap the steering wheel SLIGHTLY to the right, which should start to guide the car towards the right-hand curbing. Hit the gas until you drift to the curbing on the opposite side.
T2 -> T3
Another short section. This section was easier for me, because I used a
grasscut right before the T3 checkpoint.
You start going fast downhill, with a few minor lefts and rights that can
be handled at full speed. You'll turn left and head uphill. For this next
section, I strongly suggest you revisit license IA-13. You'll need to brake
earlier than in that test, but your line should be exactly the same. Your
braking needs to be complete before you veer left over the curbing, or you'll
probably hit the wall on the opposite side.
If you can clear the trickly left-right, then just follow the left curbing
to the tight chicane. Instead of navigating the chicane, simply drive
straight over the small hill, and start turning right once you can see the
road. I found that having the gas on before you hit the pavement helps to
prevent from sliding all the way across the road and into the grass on the
other side. If you choose to use the grasscut, and do it correctly, it saves
you about 1.5 seconds!
T3 -> T4
The upcoming section is featured in license test A-14. Although your SLR is
way faster than the TT, again, watch what the TT does to find the proper line.
After the T3 timecheck, there is a slight left, followed by a sharper left.
Take the first left at full throttle, but slow to 108mph for the 2nd left.
This leads to a L-R combo. As I've said before, do NOT trailbrake into
combination turns, as you will not be on a proper line. For this L-R use
the gear indicator as a brakepoint, and slow to 62mph. When you cross the apex of the first L, you can go full throttle through the 2nd.
Hard R - The next turn is a hard R, and is a decreasing-radius corner. Be
careful of this type of corner, because you have to slow down in advance, and more than you initially think. Also, the wall is very close to the opposite
side of this turn, so if you are too fast you will almost certainly bash the
wall and earn a 5 second penalty.
LR Combo - This turn is very similar to the L-R combo you saw a few seconds ago. You can go through this turn at a higher speed than before, but use caution, as the road surface is very uneven and may cause the SLR to freak out. Slow to 95mph before the corners, and you should be able to take both corners (in as straight a line as possible) at full throttle.
R,R Combo - Following ^, there will be two R turns. Slow to 95mph for the
first, and then coast as you hug the inside of the turn. Wait to apply
throttle until you can see the road straighten -- if you hit the gas too
early, then you'll go off into the grass.
RLR - This sequence is the last part of A-14. The brakepoint for these
corners is later than you think -- hold the throttle until just before
the curbing on the right hand side of the road. You'll have to steer while
you brake, so keep this in mind. Slow all the way down to 46mph, and then
throttle on hard. Hug the right curbing initially, but then allow the car
to drift to the outside for a little better acceleration. You'll get the T4
check when you cross some red graphiti on the pavement.
T4 -> T5
This section will start going downhill, and then there will be a gradual
left-right combo.
L - If you look over to the right as you head downhill, you'll notice a
diagonal strip of pavement. Hit the brakes as you pull even with this strip,
and slow to 67mph, coast briefly through the bottom of this 'valley' and
then apply throttle.
R - This turn is soon after the L mentioned above. The driving surface is
very uneven here, so that will reduce your grip and force you to slow down
more than you think you should have to. Also, this R occurs at the crest
of a small hill, so your traction is reduced even more. Slow down to 70mph
or maybe a little less, and you'll find that you can just make it without
crossing over into the grass (which I did a zillion times by not slowing
down enough). Brake early for this turn -- if you are late, you wont be
able to save it.
R - This is the same turn that you had to navigate in license IB-2. This
is also the site of your first wallride (if you choose to do that sort of
thing). For this turn, you want to gradually go off course and bring your
left side in contact with the railing. Hold the gas on through the entire
turn. When you've completed the turn, you should be in 3rd, going about
78mph or so. As you cross back onto the pavement, let off the throttle
BRIEFLY, which should cause the transmission to shift up to 2nd gear. If
you dont do this, your acceleration will be lousy, and it will cost you
several mph of speed in the next section. Hold R2 as you normally would.
T5 -> T6
This section is almost entirely uphill. For the uphill section, you should
be able to take every turn with full throttle. Also, be sure to hold R2
until you hit 149mph -- this will ensure you can get as much speed as
possible.
At the top of the hill here, there is a sharp L turn. I chose to
wallride around this turn. Be careful, though, as this is a difficult turn
to wallride without earning a 5 second penalty. You need to bring the
ride side of your car in contact with the wall well in advance of the turn.
Instead of just holding the gas through, also turn L on your wheel or
dualshock as you round the turn -- if you do it correctly, you wont hit
the wall with the front of your car. Let off the gas when you are around
the turn, and gently guide your car back onto the pavement. Use minimal
steering inputs here, as it is easy to upset the car's balance.
T6 -> T7
If you've done everything well up to now, you should have the SL65 in your
sights. Soon after you get the T6 split, there will be a R turn. Slow
briefly to 112mph for this turn.
Hard R - This is a sharp hairpin turn that leads to a short uphill section
that ends in the first banked section of pavement (Karrusel?). Hit the
brakes when you cross the curbing on the left side of the track, and slow
to 50mph. Again, this is a decreasing-radius corner, so dont get eager
with the throttle until the road straightens out. I passed the SL65 going
uphill BEFORE I got to the banked pavement.
Banked Pavement - I wallrode around this turn. Its pretty easy to do, and
will save you a nice chunk of time. Also, if you aren't going super fast,
then you'll probably have to battle the SL65 here. Wallriding makes it
much easier to pass this car.
L - This turn is a slight left just before a LR combo that leads onto the
'technical' section of the 'Ring. For this L, tap the brakes VERY briefly.
You may even be able to coast through this turn without braking -- just
dont go on the grass on the opposite side.
LR Combo - This turn is uphill, and leads directly into the technical
section. The gear indicator is spot-on here, so use it as your guide to
start and stop braking. Be careful though, as it doesn't appear without
flashing, so you'll need to be watchful for it to appear.
T7 -> T8
This is the 'technical' section of the 'Ring. I cannot stress enough just
how important this section is to your overall time. More likely than not,
you'll go through this section a couple of times, and think that you've got
it down, when in fact you are still giving up a couple of seconds. The
proper line through here is almost entirely over the curbs. If you find
your car in the middle of the road, then you are off line and probably
going too slow. You need to brake briefly BEFORE each turn as it comes,
and stay on the curbing! Get half of the car over it if you can. I'm not
going to post speeds through here, because there are so many corners in a row, you'll never have time to check your speed and stay on the course.
My suggestion is go back and do license test A-16. If you cant get gold
on that test, then you aren't driving the section properly. In fact, you
should be able to do quite a bit better than gold. If I recall correctly,
the gold time is 54.150s. You should be able to go through in no more
than 54s flat. If you have problems getting the gold, press the R3 button
(the right analog stick, press DOWN on the entire stick) for track lines to
follow. Practice this license test over and over and over again. Keep in
mind that you can go about 10mph faster in the SLR than in the license test.
A-16 ends on a short straight, so for the next few turns you wont have a
demo. If all is going well, then you should pass the SL500 just before
the finish of A-16. The next turn is a R, with a large sand trap off to
the opposite side. Slow to 70mph for this turn, and wait to get on the
throttle, or you'll probably visit said sand trap.
The final series in this section is a LR combo. Again, this turn is
uphill, which makes your visibility poor, so brake in advance. You can
cut the grass for the R turn of this combo if you dont slow enough for the
initial left -- this is ok, just keep in mind you are on the grass, and
traction is bad. If you slow to 65mph before this combo, you should be
able to negogiate them both under full throttle.
T8 -> T9
This section starts with a slight left that can be taken at full throttle,
which then leads to a downhill section followed by a sharp right. Just
before you need to make the right, however, there is a dip in the pavement, which will cause your car to fly through the air. Because of this, you need to brake BEFORE the dip, and when you land, slow to 85-90mph as you hug the inside curb. There is a large sandtrap here, so if you go off,
you'll slow down a ton, so do this turn correctly.
If that wasn't difficult, then the next little section certainly will be
(at least it was for me). There is a very slight left that leads sharply
downhill, which again will cause your car to fly in the air. The added
bonus here is that the road has a very sharp crown. This little turn
cost me many a good run. If you want to go through full throttle, it is
possible. The best line I found was to set up on the right hand side of
the road, and try to drive over the middle of the crown, and then hope I
landed in a straight line -- which doesn't happen often. Good luck to you
if you take this approach. A safer one, in my opinion, is to use the
airbrake. If you tap the brakes just before you crest the crown in the road,
then you wont fly in the air. This slows you down, sure, but you can get
immediately back on the throttle. I found that by hugging the inside left
of the crown, the body of the SLR rolls a bit, but you wont fly in the air
if the airbrake is up. If you drive over the middle of the road, you will
still probably leave the pavement. In either case, make sure your car is
settled before making any inputs -- even if this takes you slightly over
the grass.
For the final turn, which is a slight R, tap the brakes or coast through,
depending on how successful you were in keeping the car on-line through
the previous section. There's a large grass area here, and the road is
reasonably straight, so even if you get the whole car off, you can recover
without much of a speed loss, so be brave. You should be able to get
going pretty fast for the next section.
T9 -> T10
This section starts with a reasonably 'straight' section of the course, and
the first turn requires braking from high speed.
R - Use the gear indicator here as a brakepoint, slow to 85mph, and hug the curbing as you do it. Gas on at the apex.
L then L (banked) - For the first left in this series, there is another large
sandtrap on the opposite side. Slow to 72mph and wait to get on the gas, or you'll probably end up in the sand. For the banked turn, brake quite early, and slow to 60mph or so. Coast through the bank, and hit the gas just before you leave the banked pavement.
If you're doing well, you'll pass the 190E Touring car before you take the
R,R combo that leads to the very long straight.
R,R combo - These corners are tricky, and it is quite easy to go off into
the grass if you are too fast. For this first right, brake at the graphiti
on the road, and slow to 90mph. Dont get on the gas just yet! Coast
through the 2nd R turn, and hug the curbing. Hit the gas just before you
can see the road straighten out. If you hit the gas too early, you'll find
that the tires will squeal, and you'll slide sideways. This is ok provided
you dont go off, but it doesn't give you maximum exit speed for the straight. If you wait just briefly while you coast around the 2nd turn, you wont slide, and you can exit just a bit faster.
T10 -> T11
Not much to say here. Hold the throttle down, and use R2 for max
acceleration. If you are doing really well, you'll pass the Kompressor
just before the T11 split at the bridge.
T11 -> Finish
The final sequence of turns goes like this: A slight L, a RL combo, and
then a RLR combo.
For the slight left (which isn't that slight when you are going through it
at 200mph) can be taken flat out, provided you set yourself up correctly and turn early.
You'll need a lot of braking (from 200mph!) for the RL combo that comes up
very quickly. The gear indicator is way, way late, so if you aren't
braking well before it flashes you're in big trouble. There is curbing on
the left side of the road. Start braking about 5 car lengths before the
curbing -- this is hard to gauge correctly, so I'd work on it in practice
mode a few times to get it right. Slow to 120mph or so, and then hold the
gas briefly to take you to the final section.
You should now be very close to the SL as you navigate the RLR combo. If the SL wasn't there, then you could slow to 55mph for the first turn, full
throttle through the second, and then slow to 50mph for the final turn that
heads uphill. However, the SL will probably get in your way if you've run
a good lap, so be very careful! The SL AI takes a pretty tight line through
here, and its probably the line you want to take. So either stay right on
its bumper until the final uphill stretch, or go in the grass around it.
Dont worry about not passing it right away -- you have way, way more
horsepower, and can easily win a drag race to the finish, even if you are a
car length or two behind it rounding the final turn.
(Sears Point = Infineon Raceway )
Thanks to my Cousin For this Already been a great help with the Missions I have been stuck on
Also should Apologise for the bad paragraphs he sent it through email, and it hasnt come out correctly, tried to sort the worst of it but it's still not 100% 
[Edited on 31-05-2005 by h18_oab]
|
Skipz
Member
Registered: 23rd Aug 03
Location: Falkirk: Drives:nothing but gettin another Corsa
User status: Offline
|
Gran Turismo 4 Info and Requirements..
Info
1-2 Player
Anologue Control Compatible (Dualshock and Dualshock 2 All buttons)
Vibration Function Compatible
Stering Wheel Compatible
USB Printer Compatible
USB Keyboard Compatible
USB Flash memory Compatible
Requirements
Memory Card (8mb) (For PS2) 1493kb minimum space
Network Adapator (ethernet) (For PS2) Compatible 2-6 Players (LAN RACES ONLY!!)
Unfortunately Polophony had to scrap the Idea of Online gaming for Gran Turismo 4 due t the amount of Memory the Games uses, Prototype online versions were jumpy and were not to the Producer Kazunori Yamauchi Expectations and felt including the Online Gameplay would make the game Worse than GT3, so Instead the Added the Photo Mode in Place of Online Gameplay.
The Game is capable of connecting through the Ethernet Adaptor to allow up to 6 players to play on the same track at once on 3 different screens much like Halo on the Xbox,
Gran Turismo has Never been So good 
[Edited on 31-05-2005 by h18_oab]
|
Skipz
Member
Registered: 23rd Aug 03
Location: Falkirk: Drives:nothing but gettin another Corsa
User status: Offline
|
How To Get Online with Gran Turismo 4
Obviously you need a PS2 with a network adapter. Second you need a broadband
connection. Finally you need a broadband router connected to your cable or DSL
modem, with a windows or linux based pc and your PS2 connected to it, sharing
the internet connection. The magazine reccomends either a Linksys or Netgear
router.
You need a program known as Xlink Kai Evolution VII. What it does is take any
PS2 game with lan support and makes it think the internet is one big lan. It
does have built in chat, buddy lists, and other options for finding and
setting up games.
Make sure both your pc and PS2 are able to go online via your broadband router
and net connection. Next steer your browser to www.teamxlink.co.uk and set up
an Xtag account (this will be your username while playing via Xlink Kai). Next
download the latest version of Xlink Kai Evolution VII and install it on your
computer.
Next up you'll need to run "Start Kai Config Tool" from the Programs -> Xlink
Kai Evolution VII folder the installer created on your windows start menu.
Linux user's refer to the programs online manual at www.teamxlink.co.uk.
Once you've done that, select " normal kai use" as your default profile and
enter your Xtag and password, clicking auto login so you don't have to enter
it every time you play. Quit out and start Xlink from within the Start ->
Progams -> Xlink Kai Evolution folder.
Considering things went smoothly, you should now see the Kai sidebar screen.
From here you can click the globe icon in the menu bar and access a list of
supported games. You'll want PS2. Next click then GT4 arena. At this point
click the little arrow on the right hand side of the Kai sidebar to expand the
chat window. You'll see a list of everyone in the GT4 arena on the right, and
all of the sub-games on the left. It's best at this point to tell kai
there's "just me" playing and that you're "hosting" in the bottom box of the
left sidebar.
From there on you simply chat with other Kai users, checking out there
location and ping times (the lower the better) by clicking the small person/
magnifying glass next to thier name.
Before you play, make sure to enter the Network Battle mode in GT4 and get to
the point where you see "waiting for connection" screen on your TV. Select the
magnifying glass icon from the Kai sideber top menu to make sure you're
properly connected, then select the folder icon to make sure that your PS2 is
displayed and tagged as "configured properly."
Now for the fun. The easiest way to start playing online is to join a private
arena (on the left when in chat mode). Once you enter you can chat with other
players and someone will inevitably start hosting a game. At this point just
enter GT4's LAN mode as if you were playing a LAN game, and you'll connect
with the other users in the private arena who've done the same.
|
Skipz
Member
Registered: 23rd Aug 03
Location: Falkirk: Drives:nothing but gettin another Corsa
User status: Offline
|
Hey Folks
Thanks to Ian Splitting the replies from the Original thread 'List of cars you can Win for GT4 (PS2)' I have now set up this one, A topped thread with hints and Tips on how to Complete GT4 along with Lists of Cars in the game and the cars you can Win!
Loads more still too add so it would be appreciated if you guys did not reply until I've managed to get some more stuff up (in the Next few days) 
I have Set up a seprate bit for all your Questions which will be transferred into here when this bits finished.... GT4 Help Section Reply thread
Thanks
Skipz
|
Steve
Premium Member
 Registered: 30th Mar 02
Location: Worcestershire Drives: Defender
User status: Offline
|
ne cheats for this game yet
|
freeman(sting)
Member
Registered: 16th Oct 05
Location: Redcar and Cleveland
User status: Offline
|
anyone no what happerns after you have no fuel left also can you ever pop your tyres from driving them when there red
|
mazdaspeed
Member
Registered: 8th Jan 05
Location: Darlington
User status: Offline
|
What!? Cheats? Play the game man you'll enjoy it!
When you're out of fuel you can't go faster than 30 or 50 mph. Tyres don't pop, why would they?
|
Skipz
Member
Registered: 23rd Aug 03
Location: Falkirk: Drives:nothing but gettin another Corsa
User status: Offline
|
quote:
Originally posted by mazdaspeed
Tyres don't pop, why would they?
Cos they would come off the rim at least inreal life
Glad to see my hardwork on this is still being used 
|
andy1868
Member
Registered: 22nd Jun 06
Location: Burscough, Lancashire
User status: Offline
|
i've been whoring this game recently and found that when your tyres go to red, i don't think they pop, its just extremely difficult to control the car i've never been able to drive the car for long enough for them to "pop", this is what the pit lane is for guys 
|
|


